
Mail templates & newsletter
Creating and editing mail templates, managing newsletter sign-ups. These texts sit right next to the fields inside Kursimple – here they are to read through.
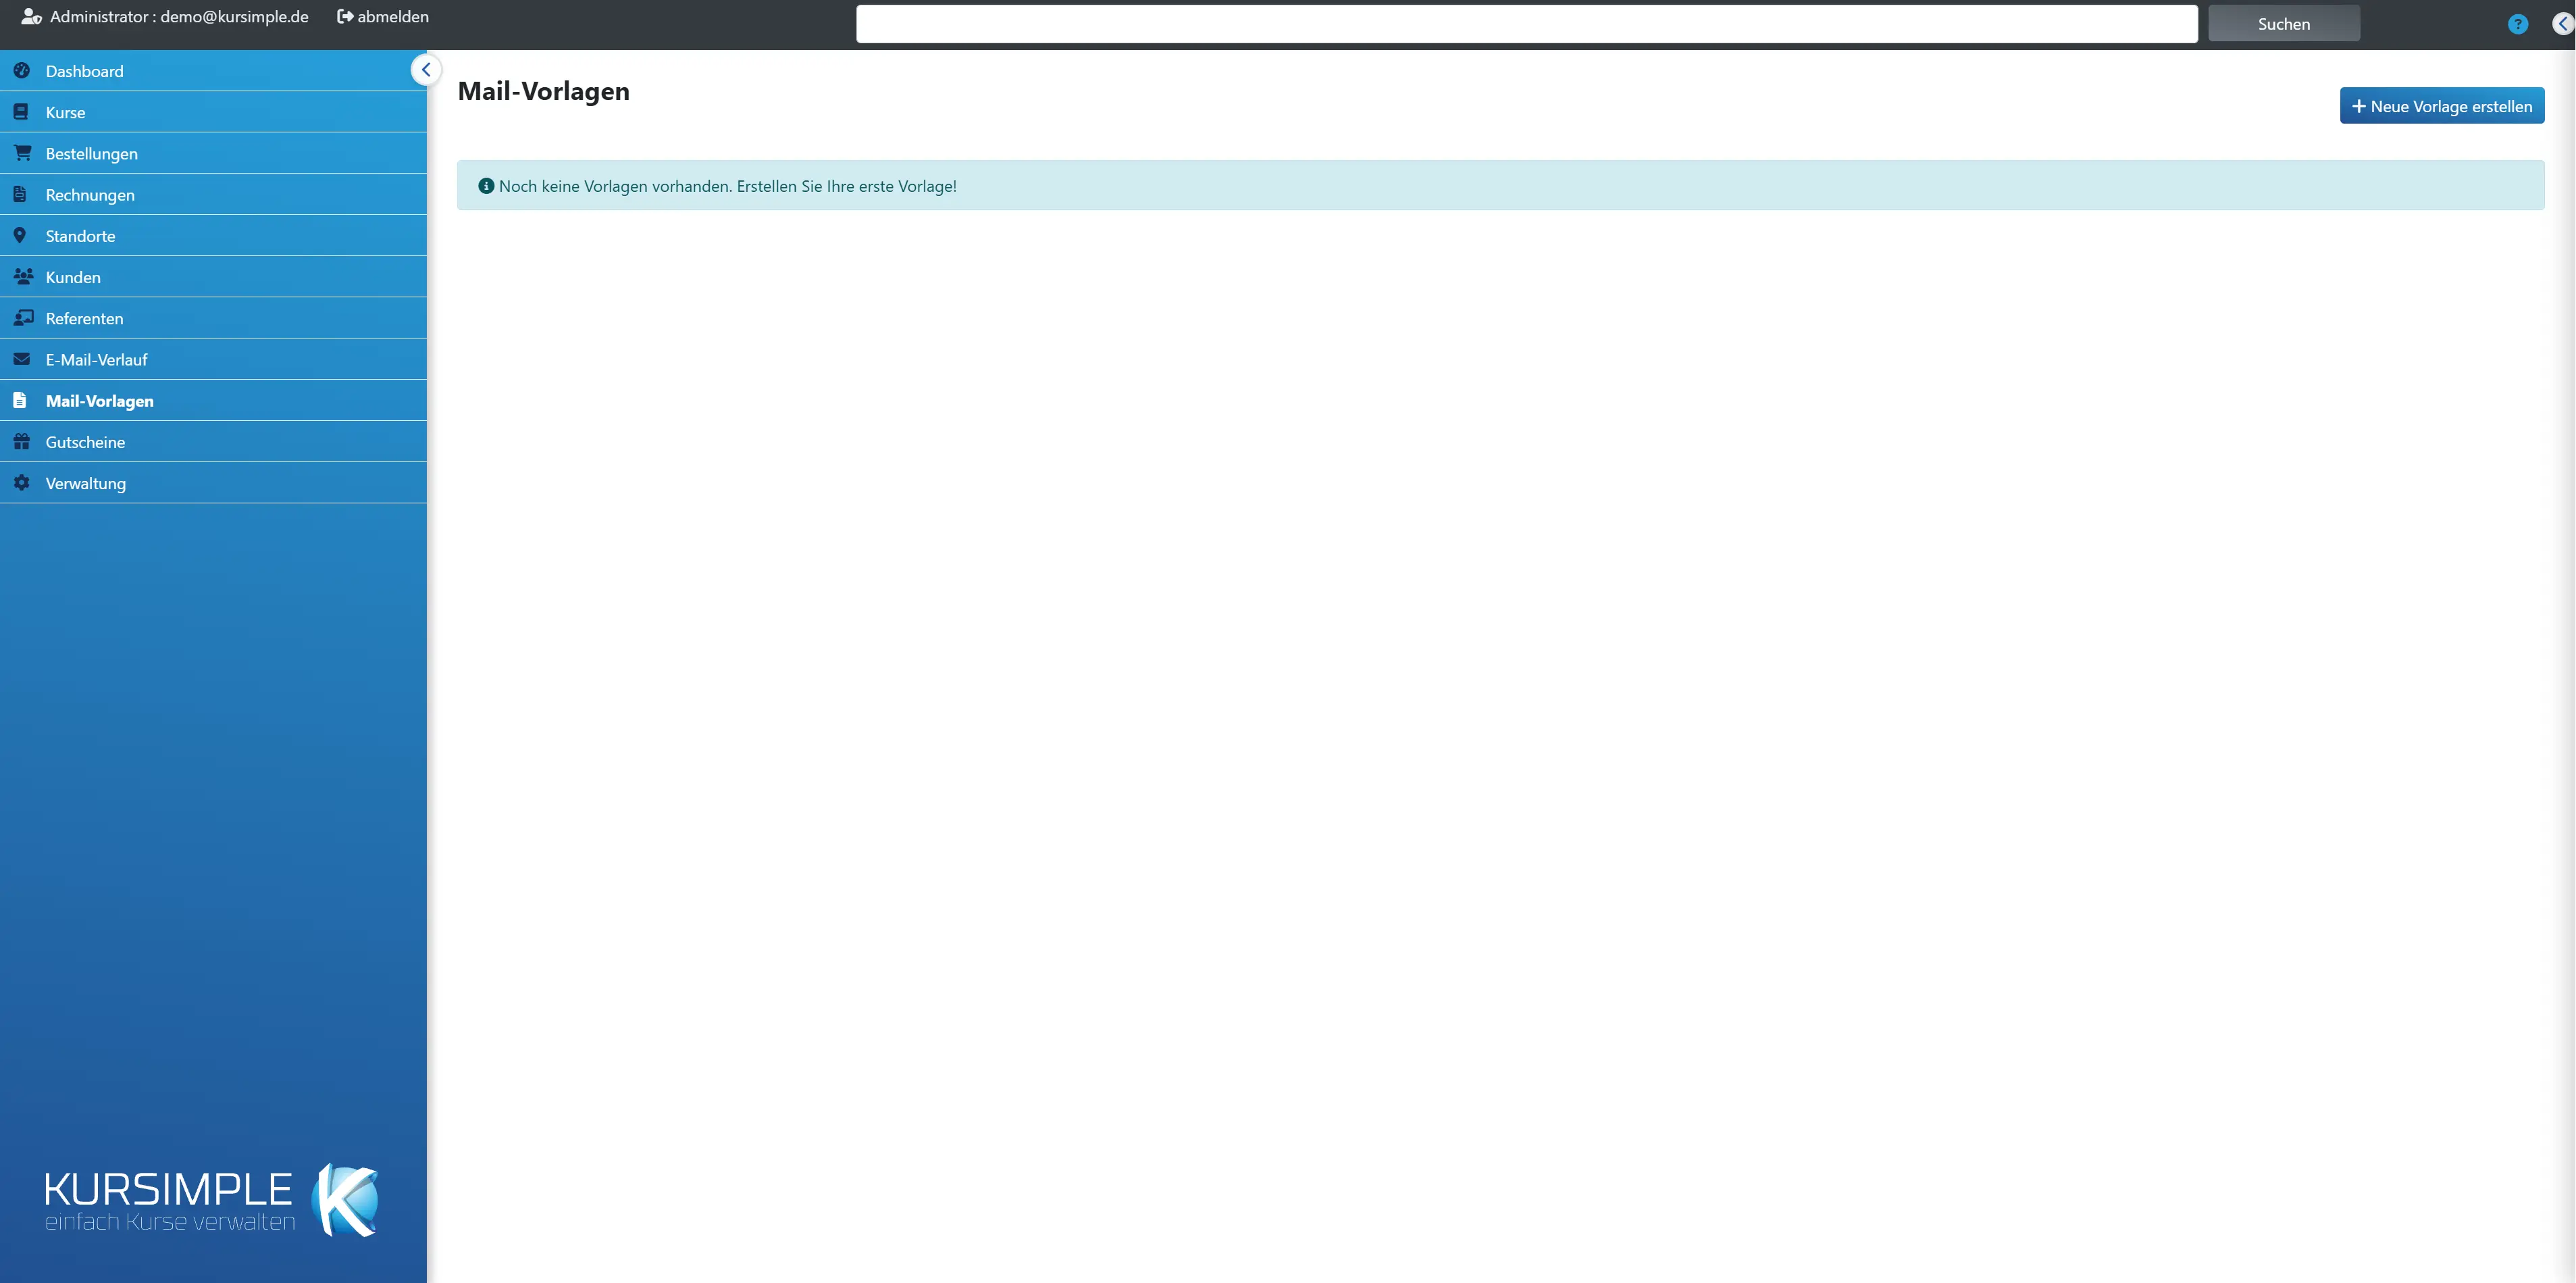
Email templates – what are they and how do I use them?
Email templates – what are they and how do I use them?
Here you keep ready-made email texts that you insert with one click when sending. This way you do not have to rewrite recurring emails every time.
What is an email template? A saved email with subject and text, optionally with its own sender address and file attachments. Typical examples: “Reminder one week before course start”, “Course cancelled”, “Welcome as a new customer”, “Your certificate attached”.
How it works in three steps:
- Click Create new template at the top right and write subject and text. Placeholders such as {Kunden_Vorname} make sure each email addresses the recipient personally.
- Send yourself a test email and save the template.
- The next time you send – for example via the email icon in the customer or order list – you choose the template at the top of the send dialog in the field Email template. Subject, text, sender and attachments are taken over, and you can still adjust them before sending.
Whose templates do I see here? Your own and all that colleagues have marked as “public”. You can view and use other people's templates but not change or delete them.
Tip: You can also create a template directly from a finished email – in the send dialog via “Save as template”.
Create new template
Opens an empty form for a new template. Only name, subject and text are required – everything else is optional.
After the click you see the form. It is best to think briefly beforehand: who will this email go to later, and what should the recipient do afterwards (for example confirm an appointment or open a link)? That helps with wording.
In the form you work from top to bottom: name, description, subject, content, then test email, then save. After saving you land back in this list, and the template is immediately available in the send dialog.
Have you already written a good email? Then you do not have to retype it: in the send dialog there is the button “Save as template” at the bottom.
Name column
The name under which you find the template again later in the send dialog. Click the eye on the right to view it.
A good name says what the template is for, for example “Reminder 3 days before course start” or “Cancellation due to too few participants”. Avoid names like “Template 1” – after a few weeks nobody knows what is in it.
The name appears only here and in the selection field of the send dialog, never in the email itself. You can change it at any time when editing.
Description column
A short note on when this template is intended. Especially helps colleagues with the selection.
For example: “Send to all participants as soon as a session has been postponed. Adjust the date in the text beforehand.” The description is shown shortened here and never appears in the email.
If the column is empty, nobody has entered a description – you can add one when editing if it is your template.
Subject column
The subject line that is taken over into the email when the template is inserted. Shown shortened here.
The subject is the first thing the recipient sees in their inbox. If it contains a placeholder such as {Kurs_Titel}, it is only replaced by the real course title on sending.
You see the full subject via the eye (view) or the pencil (edit).
Creator column
Who created the template. “Me” means: your own template – only those can you edit or delete.
Templates of other users are read-only for you. If you want to adapt someone else's template, open it via the eye, copy the text and create your own new template with it. Or ask the creator to make the change.
Visibility column
Public: all users of your administration see and use the template. Private: only you.
Private templates are handy for trying things out. Once a template is finished and tested, it is worth making it public so that the whole team uses the same text.
To change: click the pencil, set or remove the tick “Available to all users” at the bottom, save.
Created on column
When the template was created. It is worth checking very old templates occasionally.
Whether a template has been changed since, you see in the view (eye) under “Updated on”.
Actions column
Eye = view, pencil = edit, bin = delete. Pencil and bin exist only for your own templates.
- Eye – shows text, settings and attachments without changing anything.
- Pencil – opens the form for changing.
- Bin – deletes the template after confirmation.
Caution when deleting a public template: it then disappears for all colleagues as well. Emails that have already been sent are not affected and remain in the email history.
Create or edit a template – how to proceed
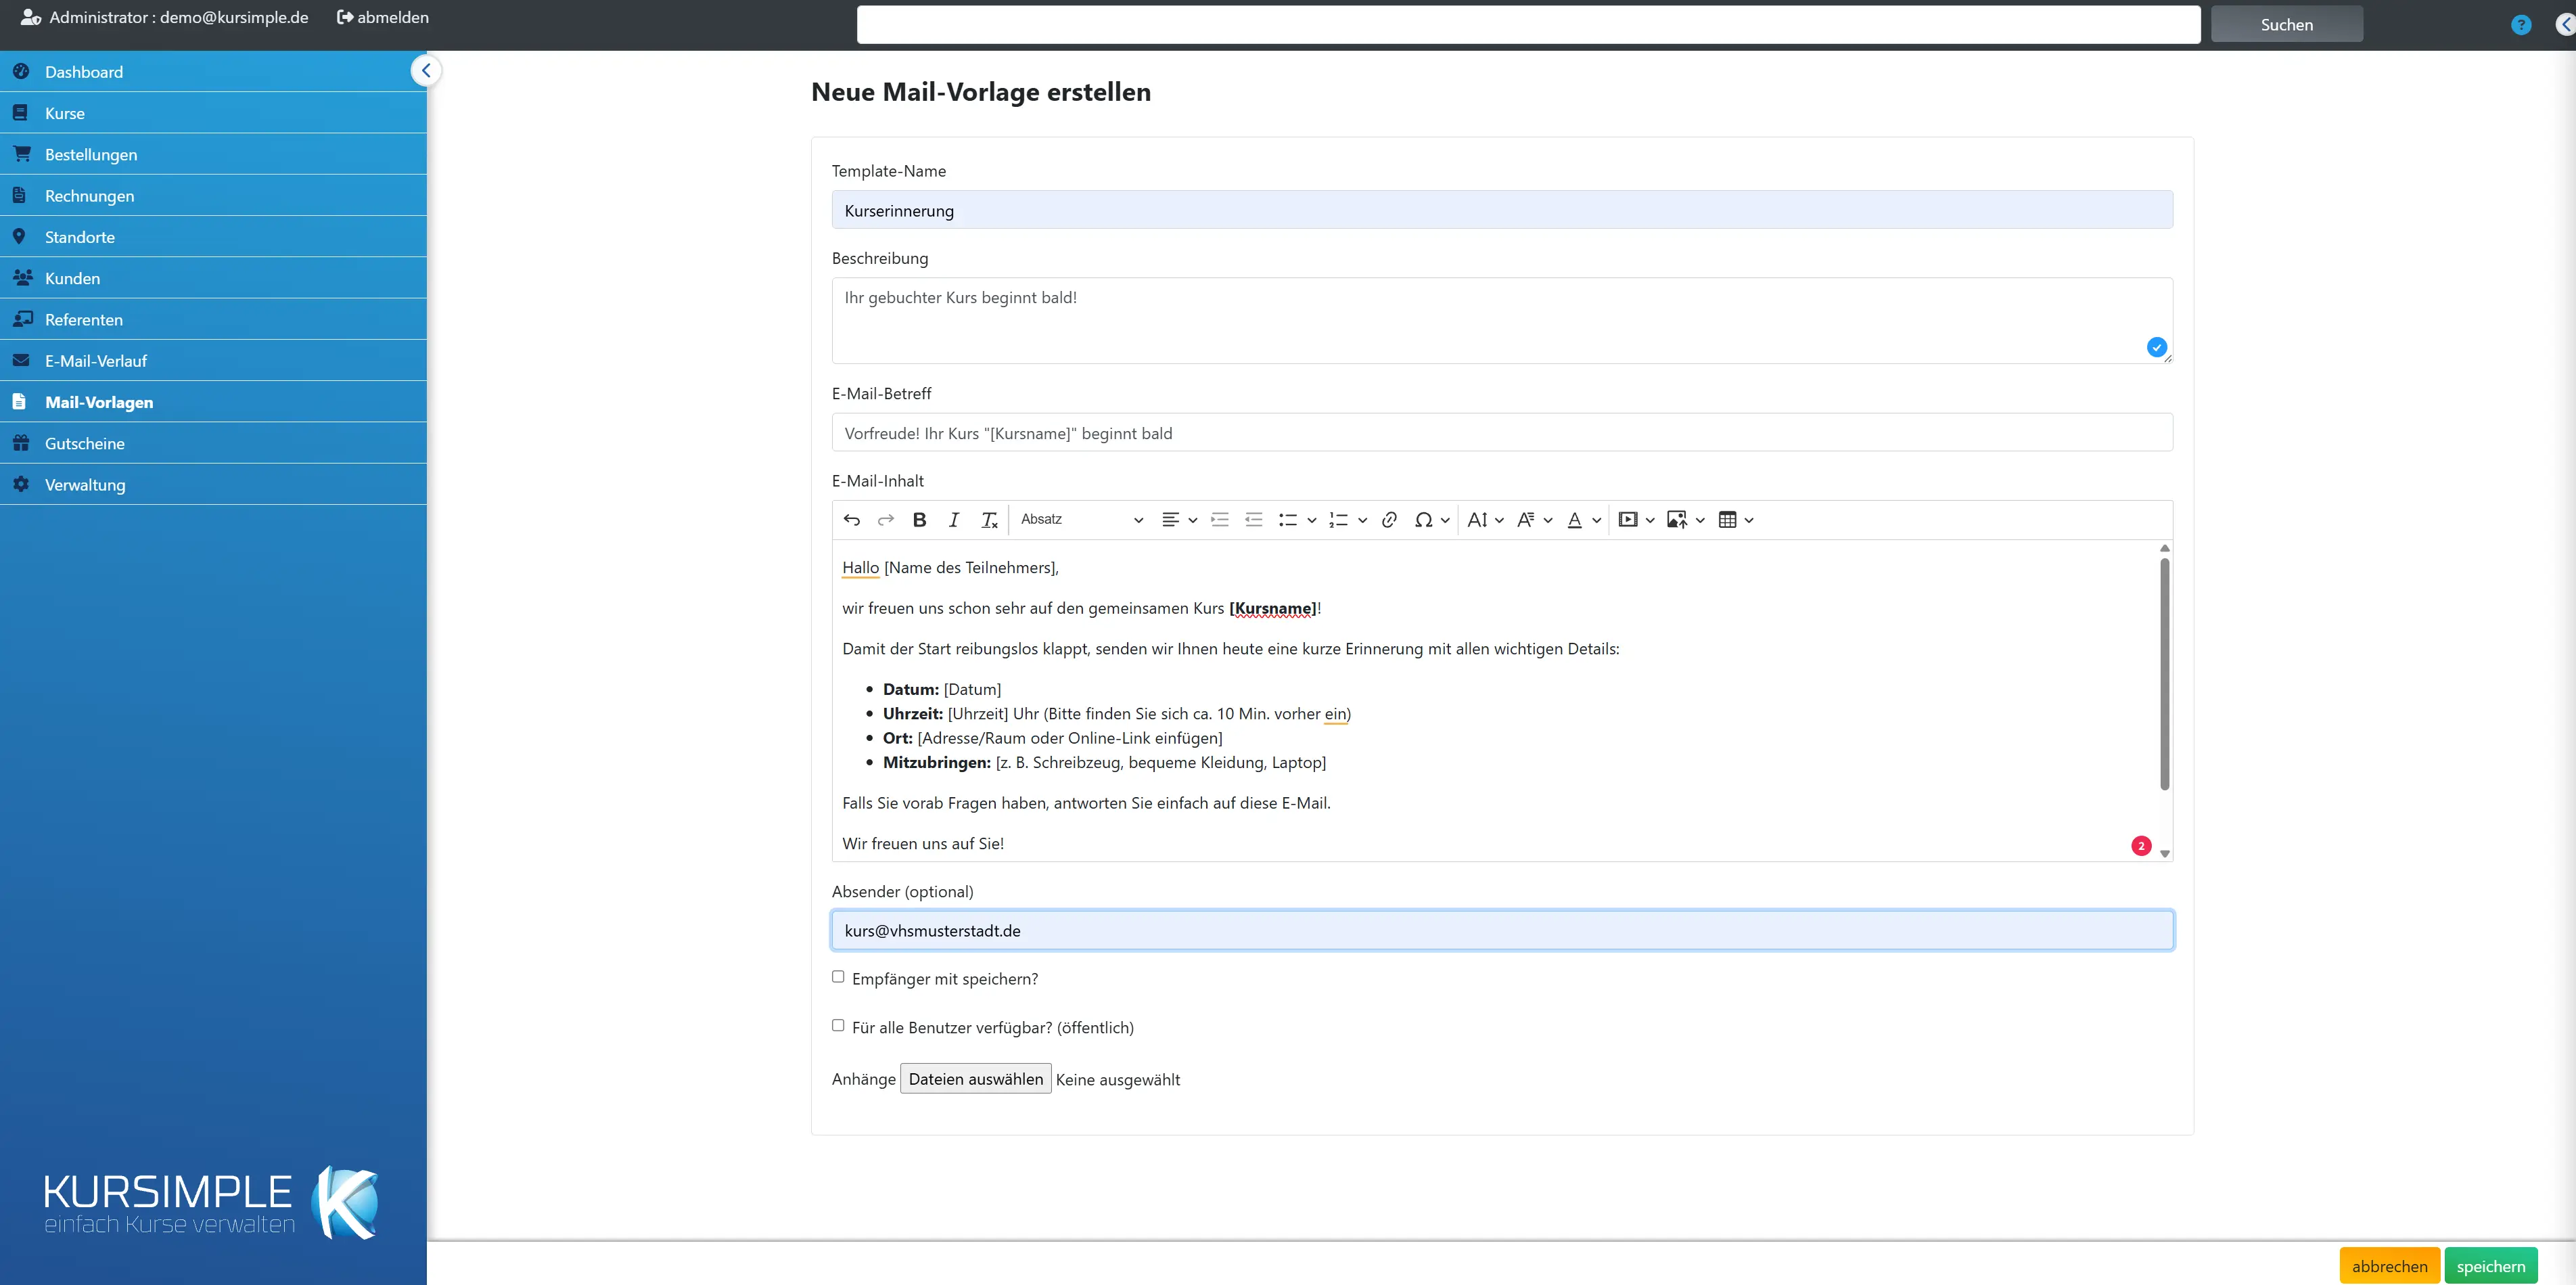
Create or edit a template – how to proceed
Work through the form from top to bottom: name, subject, content, test email, save. Fields outlined in red are required.
Step by step:
- Give it a name so that you find the template again later.
- Write the subject – short and specific.
- Write the content. For a personal salutation and course data you use placeholders: these are words in curly brackets such as {Kunden_Vorname} that are replaced with the real data for each recipient on sending. You do not have to type them – a click in the placeholder box inserts them.
- Send a test email to check text, salutation and appearance in your own inbox.
- Optional: set sender, attachments and visibility.
- At the bottom right save. You return to the list; the template can be selected in the send dialog from now on.
Required fields are outlined in red as long as they are empty and turn green as soon as they are filled in. With “cancel” you discard all entries without confirmation.
When editing an existing template the same applies. Changes only affect emails you send afterwards – emails already sent do not change.
Template name
A descriptive name so that you recognise the template immediately in the send dialog, for example “Reminder course start”. Required field.
The name appears only in the template list and in the selection field of the send dialog – the recipient never sees it. Write in it what the template is for; with several similar templates an addition such as “(children's courses)” or “(subscription)” helps.
You can change the name at any time without anything else about the template changing.
Description
Optional: a sentence for you and your team on when this template is to be used and what to adjust before sending.
Example: “Sent to all participants after a session has been postponed – enter the new date in the second paragraph.” The description appears in the template list and not in the email.
Email subject
The subject line of the email, as the recipient sees it in their inbox. Required field, placeholders allowed.
A good subject says in a few words what it is about: “Your course starts on Monday”, “Schedule change: watercolour course”. Placeholders also work here, for example “Reminder: {Kurs_Titel} starts soon” – {Kurs_Titel} is replaced by the real course title on sending.
Avoid words in capital letters and multiple exclamation marks; such subjects end up in the spam folder more often.
Email content
The actual text of the email. Write it like a letter: salutation, matter, what the recipient should do next, greeting.
Inserting a personal salutation and course data: Expand the box “Show available placeholders” below the text field. Place the cursor at the spot in the text and click the desired placeholder, for example {Kunden_Anrede} {Kunden_Nachname} for “Ms Müller” or {Kurs_Beginn} for the start date. On sending, each placeholder is replaced individually for each recipient. The box warns you if a placeholder in the text cannot get a value.
A proven structure:
- Salutation: “Hello {Kunden_Anrede} {Kunden_Nachname},”
- What it is about, in one or two sentences.
- What the recipient should do – and by when. If needed a link, for example {Widerrufsbelehrung_Link}.
- Greeting and your name or the name of your organisation.
Formatting: With the toolbar you can set bold and italic, insert headings, lists and links, and embed pictures from the image library (picture icon). Less is more: a clear text with a list reads better on a phone than colourful design.
Next step: Send yourself a test email at the bottom right before you save.
Classic editor or builder?
Two ways to design the content. Classic: like a word processor, for normal text emails. Builder: a construction kit with columns, pictures and buttons, for designed newsletters.
When which editor?
- Classic editor – for all emails that should look like a letter: reminders, confirmations, cancellations. Quick, simple, looks good in every email program.
- Builder – for newsletters and promotional emails with pictures, several columns and coloured buttons.
How to use the builder: Drag blocks (text, picture, button, divider, sections with one to three columns, table) from the bar into the email. A click on an element opens its settings; you change text by double-clicking. At the top you find preview, full screen as well as undo and redo. Behind the layout icon at the top left are ready-made starter layouts (“Simple letter”, “Newsletter”, “Announcement with button”, “Two columns”) – with them you do not start from scratch. You find placeholders behind the tag icon at the top right and drag them into the text like a block. In the picture block you choose a picture from the image library; only administrators can upload new pictures.
Switching: A click on the other button loads the page in the other editor. Changes not yet saved are lost in the process – so save first.
Important: A template built with the builder should not be saved in the classic editor. The layout of columns and tables would be destroyed; a warning points this out. Stay with the editor the template was created with.
Sender (optional)
A different sender address just for this template. Leave empty, then the default address of your administration applies.
Useful if replies should land with a particular department, for example (“courses@your-school.com”). Only use addresses of your own domain, otherwise email programs easily classify the email as spam.
Replies from recipients go to this address. You maintain the default address under Administration → Tenant data.
Save recipients too?
Only important if you save a template from a send dialog: then the template remembers the recipients chosen at that time.
There are no recipients on this page – they only come in on sending. The tick therefore takes effect for templates you create via “Save as template” from a send dialog: the people selected there are saved along and are entered as recipients again the next time the template is inserted.
Handy for fixed distribution lists, such as “all speakers”. For templates that go to changing customers, leave the tick off.
Available to all users? (public)
Set the tick so that all colleagues can see and use the template. Without the tick it stays your private template.
Others can use a public template but not change or delete it – that stays with you. Only make a template public once you have checked it with a test email, so that the team does not send a half-finished text.
You can remove the tick again at any time later.
Attachments
Files that are automatically sent along with every sending of this template, for example an information sheet as a PDF.
Adding: Click “Select files to attach” or drag files straight into the area. Each file appears as a small chip; the X on the chip removes it again. Pictures are passed through the image editor before attaching, where you can crop them.
Note: From 10 MB total size the system warns – many mail servers do not accept emails that large. Attachments are only taken over on saving; the test email therefore only contains them for a template that is already saved.
When the template is inserted in the send dialog, the attachments are taken over and can still be added to or removed there.
Test sending
Sends the template as a trial to the address entered – pre-filled with your own – so that you see how it arrives at the recipient.
How it works: Check the address, click “Send test email”, open your inbox. The subject begins with “[TEST]” so that you recognise the email immediately. Placeholders are filled with sample data (for example “Erika Mustermann”), links to the booking frontend point to your real address.
What to look out for: Is the salutation right? Are paragraphs and lists legible? Are pictures displayed? Do links work? If possible, also check the email on your phone.
The test sending saves nothing. If no email arrives, look in the spam folder and check the sender address. Attachments are only included if the template is already saved.
Save
Saves the template and takes you back to the list. From then on you can select it in the send dialog. Nothing is sent in the process.
If a required entry is missing, the page stays open and the field concerned is marked red – complete it and save again.
When editing, the change only affects future emails. Emails already sent stay as they were.
Cancel
Discards all unsaved entries and goes back to the list – without confirmation.
If you want to keep the text, click “save” instead. An existing template stays in its last saved state when you cancel.
Delete
Permanently deletes this template, after confirmation. Emails already sent are kept.
A public template then disappears for all colleagues too. If you are unsure, remove the tick “Available to all users” instead – then only you see the template.
View template
View template
Here you see text, settings and attachments of a template without changing anything – also for templates of other users.
Use this view to check before sending whether the template fits. Placeholders such as {Kunden_Vorname} still appear here in curly brackets; they are only replaced by the recipient's data on sending.
If it is your own template, “Edit” at the top right leads to the form. With “Back” you get to the list.
Template information
The settings of the template at a glance: name, description, subject, sender, creator, visibility, saved recipients and date.
- Sender “-” means: the default address of your administration applies.
- Visibility: public templates are seen by the whole team, private ones only by the creator.
- Recipients saved: “Yes” means fixed recipients are entered when the template is inserted.
- Updated on shows whether the template has been changed since it was created.
Email content
This is what the text looks like. Placeholders in curly brackets are only replaced by real data on sending.
To see how the email looks with the placeholders filled in, open the template for editing and use the test sending.
Attachments
These files are automatically sent along every time the template is sent.
You add or remove attachments when editing. In the send dialog you can adjust them once more before sending.
Edit
Opens the template for changing. The button exists only for your own templates.
You cannot edit other people's templates. If needed, copy the text into a new template of your own.
Back
Leads back to the list of templates.
Nothing is changed.
Newsletter sign-ups (without account)
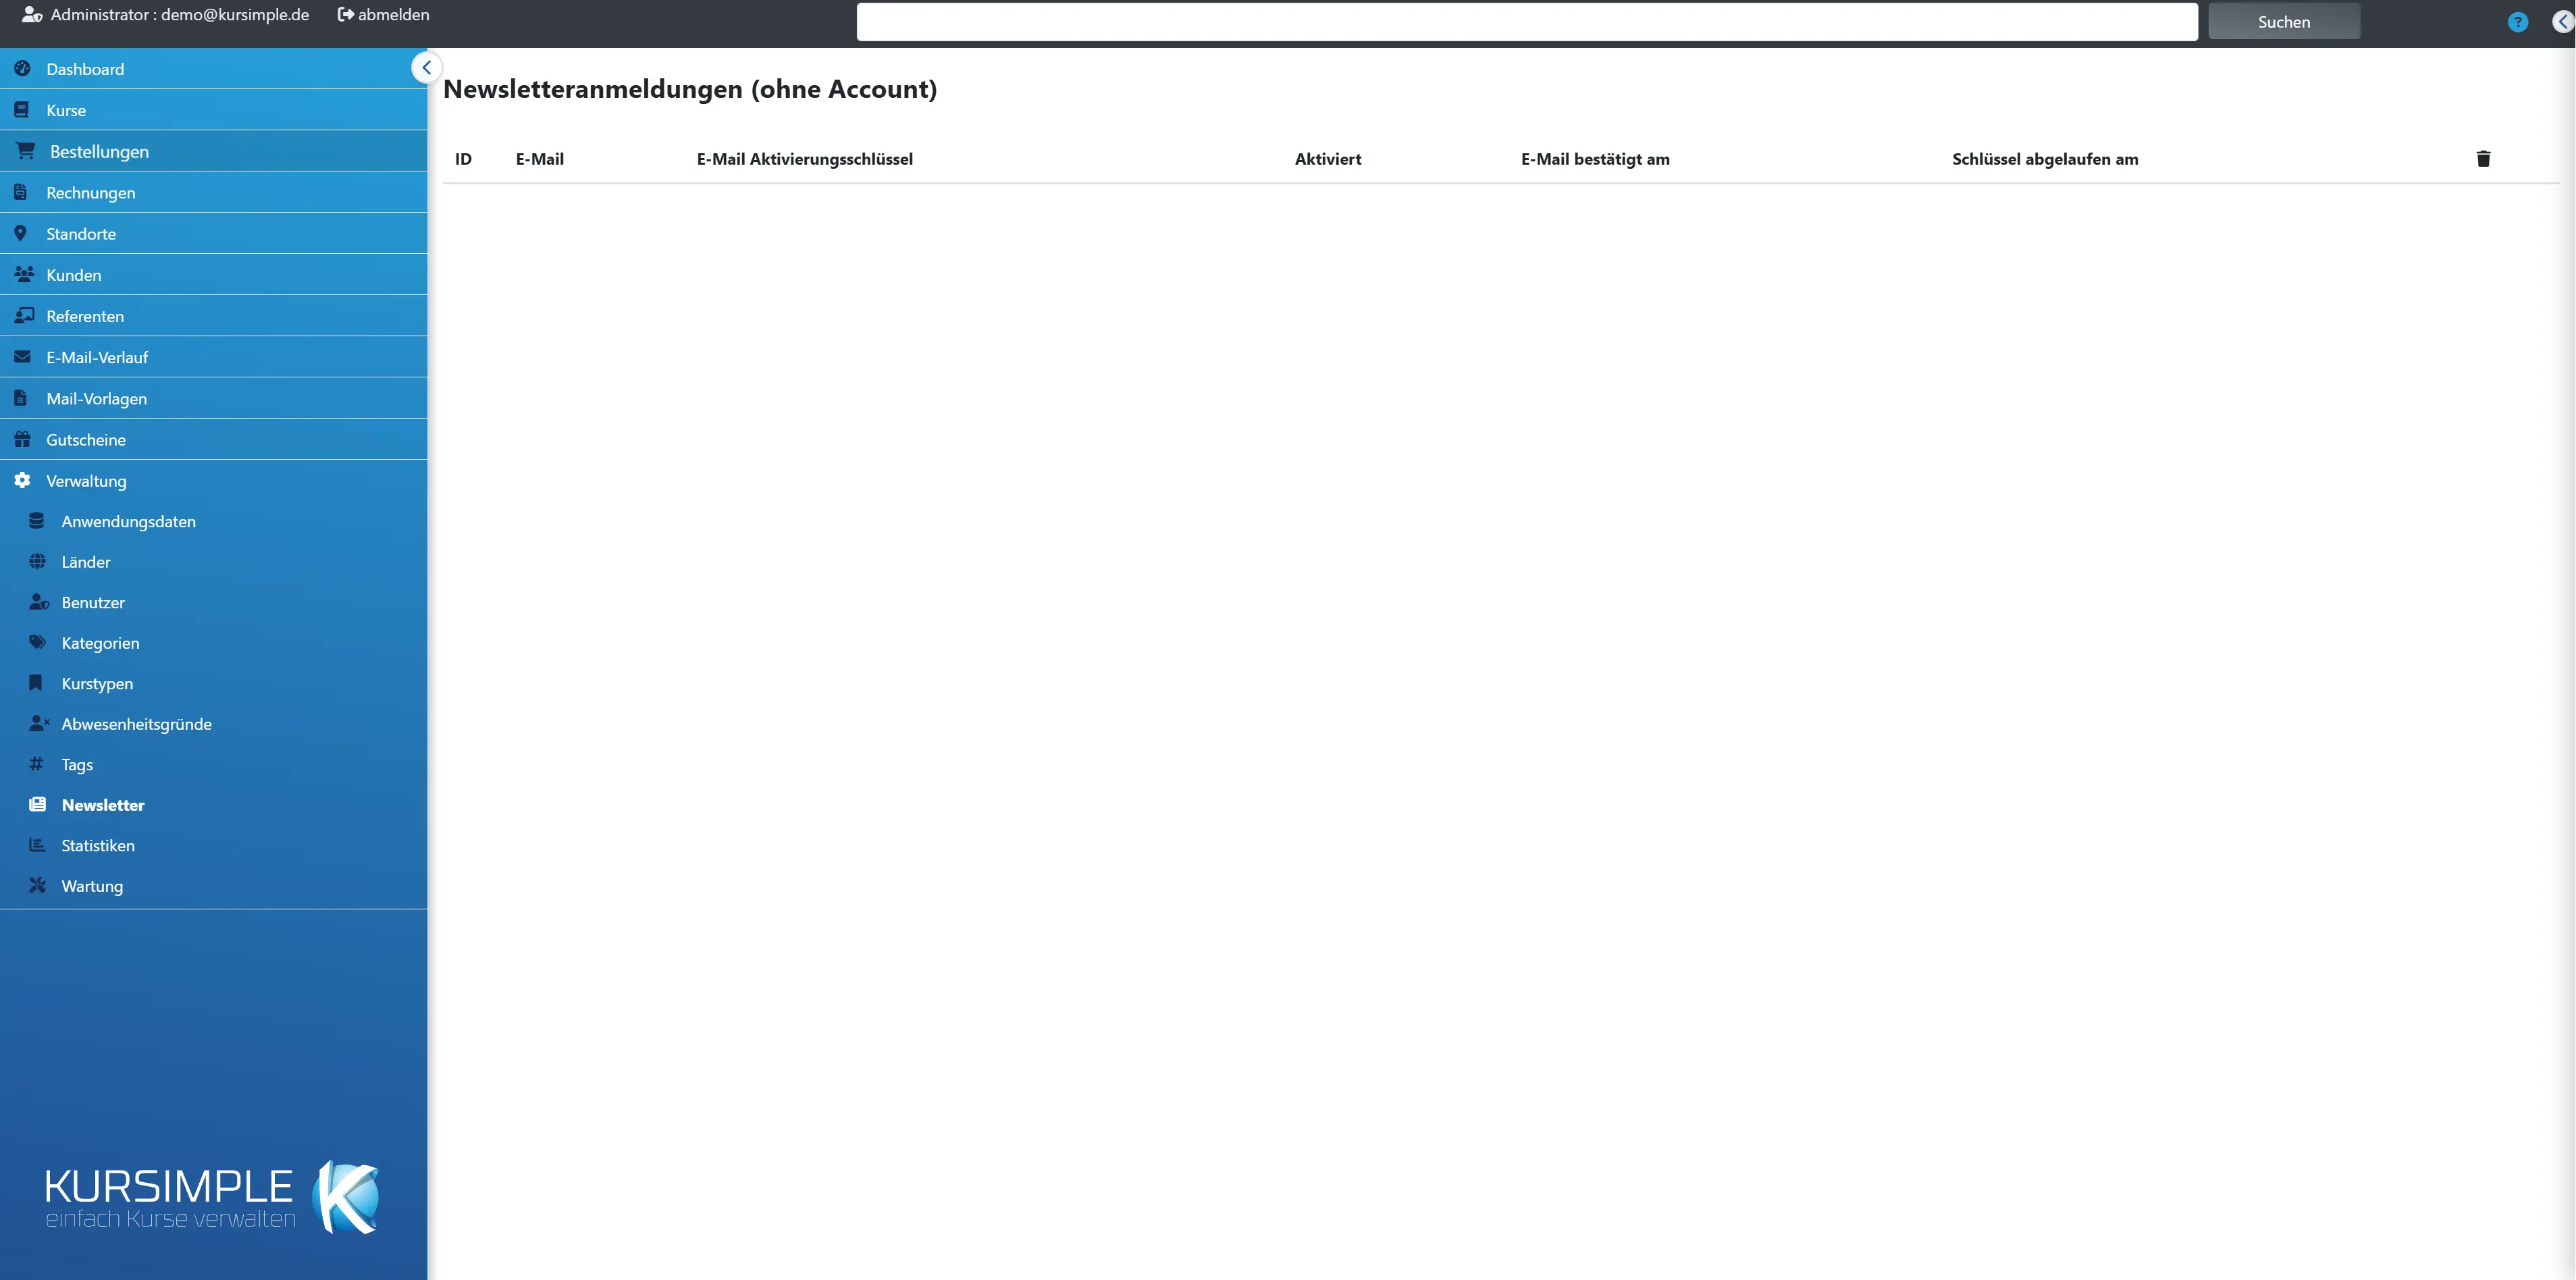
Newsletter sign-ups (without account)
People who signed up only for the newsletter in the booking portal without being a customer. They receive bulk emails with the tick “Email is newsletter” – but only after they have clicked the confirmation link from the sign-up email (column “Activated”).
This is the legally required proof of consent (double opt-in): sign-up in the portal → email with activation link → click → “Activated: Yes” with date. Unconfirmed entries receive no newsletter and can be deleted after the link has expired.
You do not manage customers with an account here but in the customer record (field “Newsletter”). When sending “Email to all newsletter recipients”, both groups are combined. The menu item appears only if the newsletter is switched on for your tenant.
ID
Internal number of the sign-up, assigned by the system.
Relevant for internal use only.
The registered address. With the filter field below you check whether someone is signed up, e.g. when an interested person asks.
If the person no longer wants the newsletter, delete the entry via the bin icon – or the person uses the unsubscribe link in the email.
Email activation key
The key from the confirmation link – technically relevant only. You do not have to do anything with it.
If someone did not receive the confirmation email, they have to sign up again in the portal; a new key is then created.
Activated
Yes = confirmation link was clicked, the address receives newsletters. No = not yet confirmed, no newsletters.
You do not set the activation by hand – this is intentional so that consent remains provable. The only exception is the import: there you explicitly confirm the consent, and below the address it says “imported on … by …”.
Email confirmed on
When the confirmation link was clicked – your proof of consent.
Empty for unconfirmed sign-ups.
Key expired on
Until when the confirmation link was valid. If the date has passed and “Activated” is No, the sign-up is worthless and can be deleted.
The person can sign up again at any time.
Delete
The bin icon in the row removes the sign-up permanently – the address no longer receives newsletters.
Use it for unsubscribe requests and for expired, never confirmed sign-ups. If you delete a confirmed sign-up, this counts as an unsubscribe: a later import does not enter the address again (block note). If the person signs up again themselves and confirms, they are back on the list.
Import newsletter addresses
Take over addresses from a CSV file: upload the file, choose the column with the email, check in the trial run and import with confirmed consent.
Imported addresses are active immediately, without a confirmation email. Addresses that are already in the list or have unsubscribed are not taken over by the import.
Reset all filters
Clears the filter field. Appears only when a filter is active.
Afterwards shows all sign-ups again.
Filter by email
Enter the address or part of it – this is how you quickly check whether someone is signed up and activated.
Works as you type.
Import newsletter addresses
Import newsletter addresses
In four steps: upload the CSV file, choose the column with the email address, check the trial run, import with confirmed consent. Only the last step saves.
Only the email address is taken over. The file stays on the server until the import and is deleted afterwards or after one day at the latest.
CSV file
A table as CSV, e.g. from Excel “CSV (delimiter-separated)”. The system recognises the character set (UTF-8 or Windows) and the delimiter itself.
At most 5 MB and 5000 addresses per file. Further columns (e.g. names) may be in the file; they are not taken over.
Column with the email address
Column with the email address
Choose in which column of the file the email address is. If a column is called “Email” or “Mail”, it is already preselected.
Below you see the first records of the file for checking.
Trial run
Trial run
This is what the import would look like – nothing is saved yet. All new addresses are ticked, you can deselect individual ones.
When you click “import”, the system checks each address once more. Anyone who has signed up or unsubscribed in the meantime is skipped.
Status
New = will be imported. Already exists = is already in the newsletter list (confirmed or not). Unsubscribed = has unsubscribed. Error = not a valid address or duplicated in the file.
The import never takes over addresses that already exist or have unsubscribed. An unsubscribed person only gets back on the list if they sign up again themselves and confirm.
Confirm consent
Required: you confirm that every selected person has agreed to the privacy terms and wants to receive newsletter emails.
Because consent is thereby available, the addresses are active immediately, without a confirmation email. As proof the system saves the time and your name for each address. Keep the consents yourself (e.g. signed forms) – the burden of proof is yours.
Newsletter import completed
Newsletter import completed
How many addresses were taken over. In the newsletter list they appear with “imported on … by …”.
The uploaded file has been deleted.
Rather see it than read about it?
In 30 minutes we will show you Kursimple with your own course programme. Or set up your own test system in 30 seconds – both free and without obligation.
Questions? +49 5931 990 99 10 · Mon–Thu 8:30–17:30, Fri 8:00–14:00 (CET)