
Series, subscriptions, free dates & forms
Course series, subscription models, date templates for the free choice of dates, course types, categories, extra fields and follow-up forms. These texts sit right next to the fields inside Kursimple – here they are to read through.
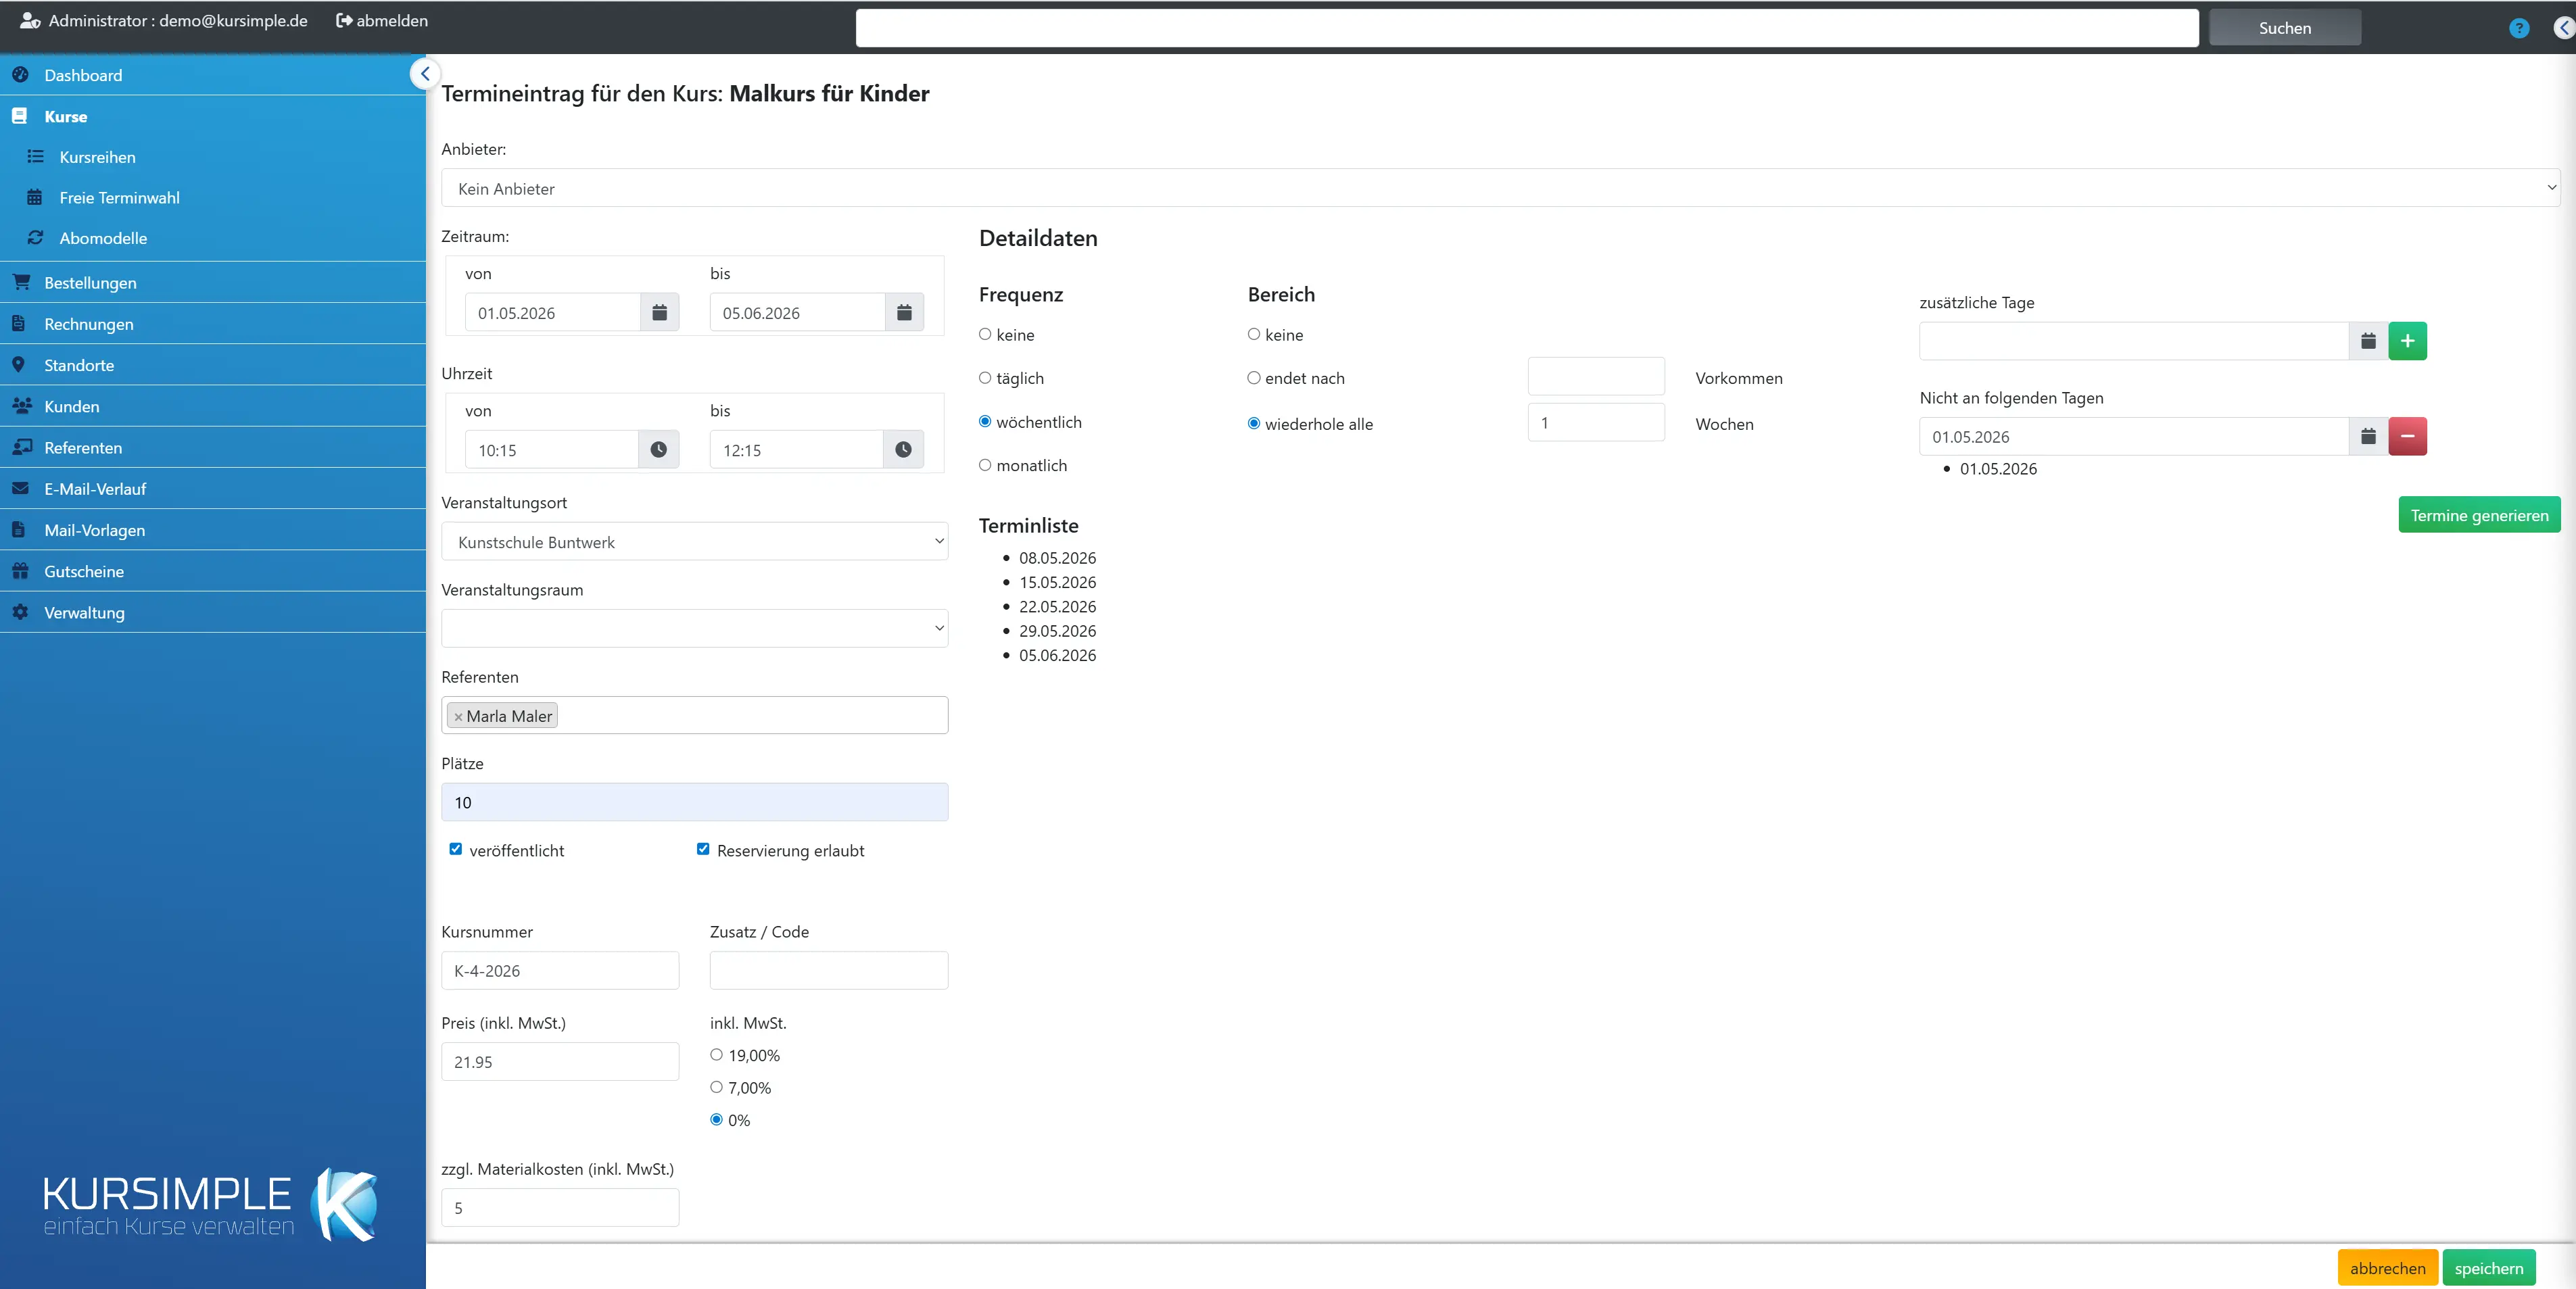
Course packages
Course packages
A course package combines sessions that are only booked together. If someone puts one session of the package into the shopping cart, all sessions come along and one order is created.
A session belongs to at most one package. For a new run you create a new package. A course's course series is not affected – it only structures.
The feature is switched on per provider via the variable KURSPAKETE.
Name
Name of the package, as customers see it in the booking portal and in the shopping cart.
Change via the pencil.
Sessions
The sessions of the package with course and start, sorted by date.
You set which sessions belong to it when editing.
Total price
Sum of the individual prices of all sessions of the package – there is no separate package price.
Each session is booked and charged at its own price.
New course package
Creates a course package: name, description and at least two sessions.
Available are future sessions of normal courses that are not yet in another package.
Create or edit course package
Create or edit course package
Name, description and the sessions of the package. The description appears in the booking portal with the note “Only bookable together”.
Choose at least two sessions. A session that is already in another package does not appear in the selection.
Save
Saves the package. From then on its sessions can only be booked together.
If you take a session out, it is immediately bookable individually again.
Delete
Deletes the package after confirmation. The sessions remain and can then be booked individually again.
Existing orders do not change.
Course series
Course series
A course series is a bracket around several courses, e.g. “Spring programme 2027” or “Watercolour cycle”. Here you create series; which course belongs to one you set in the course data of the course (field “Course series”).
The series changes nothing about prices or booking – it only groups. In the administration's course list you see the assignment as a badge “Course series: …”; it does not appear in the booking portal. Sessions that should only be booked together you combine in a course package (Courses → Course packages).
How to proceed: “Create new course series” → enter name and description → save → select the series in the course data of the desired courses.
The menu item appears only if course series are switched on for your tenant (Administration → Variables, KURSREIHENMENUE).
Selection
Checkbox for marking the series you want to remove with “Delete” at the bottom.
Several series can be deleted at once.
ID
Internal number of the series, assigned by the system. Customers do not see it.
Useful only for internal communication.
Name
This is what the series is called in course editing, in the course list and in the booking portal.
To change, click the pencil in the row.
Created
When the series was created.
Helps with tidying up old series, e.g. after the end of a term.
Edited
When name or description were last changed.
Assignments of courses do not count here.
Actions
Pencil = edit name and description of the series.
Which courses belong to the series you do not change here but in the course data of the individual courses.
Delete and remove from courses
Tick if deleting should also cancel the assignment in the courses. Without the tick a series cannot be deleted as long as courses still belong to it.
Without the tick you get a red message with the affected courses and nothing is deleted. With the tick the courses are detached from the series – the courses themselves are fully kept – and the series is then deleted.
Delete
Deletes the marked series after confirmation. Courses are never deleted, at most detached from the series (see the tick next to it).
Without a marked series “No course series selected for deletion” appears.
Create new course series
Opens the form for a new series (name and description). Afterwards you assign the series in the course data of the matching courses.
Create series before you create the courses of the new programme – then you can assign them straight away when creating.
Edit course series
Edit course series
Name and description of the series. They structure the courses in the administration; they do not appear in the booking portal.
Changes take effect immediately for all courses of the series.
Name
Required field. Short and unambiguous, e.g. “Summer academy 2027” – this is how the series appears in course editing and in the portal.
Avoid abbreviations that are known only internally.
Description
Optional text for customers: what is the series about, who is it meant for, can individual courses be booked?
Formatting via the editor bar.
save
Creates the series or applies the changes and leads back to the list. Afterwards: assign the series in the course data.
The name is required and outlined in red as long as it is empty.
cancel
Back to the list without saving. Entries are lost.
Series that are already saved remain unchanged.
Flexible date selection
Flexible date selection
Courses in which the customer chooses a time slot themselves – e.g. trial lessons, one-to-one lessons, consultation appointments. Here you see all such courses with future time slots; a click on the course opens the booking calendar.
A course of the type “Flexible date selection” gets a session with many course days (the time slots) under “Sessions”. Customers choose one of them in the portal; you book in the administration via the calendar.
How to create an offering: “Create new session template” → fill in the course data (price, description) → create a session and generate the time slots in the course-days planner (e.g. weekly; you add further slots on the same day after saving in the list of course days) → set places per time slot → publish.
The menu item and the course type appear only if flexible date selection is switched on for your tenant (Administration → Variables, TERMINWAHLMENUE).
Course
A course with flexible date selection. A click opens the month calendar with the time slots, in which you create or release bookings.
Courses whose time slots all lie in the past no longer appear here – create new time slots in the course or copy the session to a new date.
Create new session template
Creates a new course of the type “Flexible date selection”. After the course data you go straight on to the session in which you generate the time slots.
Tip: for the session, understand the “places” as places per time slot (1 for individual appointments).
Booking calendar of flexible date selection
Booking calendar of flexible date selection
The month calendar shows the time slots of this course per day. Click a slot to book it (search customer → choose participants → “Book course session”), change its status or release a booking again.
The colour of a slot shows its status: bookable, on request, unavailable or already booked. With the arrows next to the month name you page.
Entering a phone booking: click the slot → in the dialog at the bottom “Search customer” (type name or email, click the hit) → tick participants → “Book course session”. A normal order “On hold” is created; the slot counts as booked.
Afterwards: The customer gets no automatic email. Open the order (the order number is in the success message), send the confirmation and create the invoice.
Change month
With the arrows left and right of the month name you page one month back or forward.
Past days are displayed but can no longer be booked.
Edit session template
The dialog for a time slot: at the top time and existing bookings (with link to the order), below status and type of the slot, at the very bottom the booking for a customer or the release.
If the slot is already booked, you see the order(s) linked and can reopen the booking via “Release reservation/booking”. If it is free, you can book it for a customer or e.g. set it to “unavailable” if the speaker is absent that day.
Status
“Booking possible” = customers can book the slot in the portal. “Request possible” = is displayed but not booked directly. “unavailable” = blocked, e.g. holiday or break.
The system itself sets booked slots to “booked”; on release they become “Booking possible” again. Change the status only for free slots – for booked ones you use the release below.
After the selection click “Save”.
Type
Free addition to the time slot, e.g. “Single lesson”, “Taster course” or “advanced only”. Appears with the slot.
Optional. Apply with “Save”.
Create booking
Leads to a separate booking page. The quicker way is to book directly here in the dialog: “Search customer” → choose participants → “Book course session”.
The separate page is an older way and is hardly needed any more; use the dialog.
Save
Applies status and type of the time slot – takes effect immediately in the portal.
Bookings are not affected by this.
Search customer
Type name or email of the customer; the hit list appears as you type. A click on the hit takes over the customer and loads their participants.
The customer must already exist in the customer records. Create a new customer first under “Customers”, then return here. The X next to the field cancels the selection.
Select participants
Tick the people who take the time slot – the customer themselves or their participants. At least one person, otherwise “Book course session” stays blocked.
One place of the slot is occupied per person. If the person is missing, create them in the customer record under “Participants” and search for the customer here again.
Book course session
Creates the order for the chosen participants, occupies the time slot and sets it to “booked”. Afterwards you see the order number in the success message.
The order then appears “On hold” under “Orders” – send the confirmation there and create the invoice. If the slot is no longer bookable in the meantime, an error message appears.
Cancel associated order completely
Tick if, when releasing, the customer's order should be cancelled too (all items, participants, credit notes if applicable). Without the tick only the time slot becomes free again and the order remains.
Customer cancels: tick – then everything is done. Only rebook: release without the tick, then enter the new session in the order.
Release reservation/booking
Makes the time slot bookable again after confirmation. With the tick above it the order is cancelled in addition – the customer is not informed automatically.
After the release “The session has been released” or “The order has been cancelled completely; booked times have been released” appears. Inform the customer by email if needed.
Booking from the free choice of dates
Booking from flexible date selection
Older booking page for a time slot. Use the dialog in the booking calendar instead (click slot → search customer → choose participants → “Book course session”) – it is more complete and quicker.
If you ended up here: back to the course under “Flexible date selection”, click the desired slot in the calendar and create the booking in the dialog.
Customer
The customer to book for. After the selection click “Load customer”.
In the booking calendar the same works via “Search customer” with type-ahead search.
Load customer
Loads the participants of the chosen customer so that you can select a person below.
Only then does “Create order now” make sense.
Participant
Who takes the time slot. “Automatic” takes the customer's first available person.
The customer and their participants are available.
Create order now
Is supposed to create the order and occupy the time slot.
This works reliably via the dialog in the booking calendar (“Book course session”).
Subscription models
Subscription models
A subscription model sets the rules for subscription courses: description for customers and notice period in months. Courses of the type “Subscription” refer to a model in the course data.
How to set up a subscription: create the model here (e.g. “Monthly subscription, 1 month notice”) → create a course of the type “Subscription” and choose the model in the field “Subscription model” → create sessions.
The notice period is added automatically when entering a termination date in the “Participants” tab of the course. The menu item appears only if subscriptions are switched on for your tenant (Administration → Variables, ABOMENUE).
Selection
Checkbox for marking the models you want to remove with “Delete”. Models still used by courses cannot be deleted.
Remove the assignment in the affected courses first.
ID
Internal number of the model, assigned by the system.
Relevant for internal use only.
Name
This is what the model is called in course editing and in the booking portal, e.g. “Annual subscription”.
Change via the pencil in the row.
Description
Excerpt from the short description – what customers read in overviews.
You maintain the full customer text in the model under “Description text/customer info”.
Actions
Pencil = edit model (name, texts, notice period). Changes apply immediately to all courses with this model.
Termination dates that have already been entered do not change retroactively.
Delete
Deletes the marked models after confirmation. If a model is still used by a course, an error message appears and it is kept.
Cannot be undone.
Create new subscription model
Opens the form for a new model. Afterwards select it in the course data of the subscription courses.
Have the notice period and the explanatory text for customers ready.
Edit subscription model
Edit subscription model
Name, texts for customers and notice period of the model. All courses using this model take over the changes immediately.
In the description text, explain clearly to customers how long the subscription runs, how it is billed and how to terminate – this saves queries.
Name
Required field. Short designation such as “Monthly subscription” or “Annual subscription with quarterly notice”.
Appears in course editing, in the course list (badge “Subscription: …”) and in the portal.
Description text/customer info
Detailed explanation for customers in the booking portal: term, billing, termination. Displayed on the course page.
Formatting via the editor bar. Write in full sentences, as you would explain it on the phone.
Short description
One sentence for lists and overviews, e.g. “Cancellable monthly, billing by direct debit”.
Appears in the model list and in short views.
Notice period
Period in months. If someone enters a termination for a participant, the system adds these months and suggests the date as “Termination as of”.
Example: period 1 month, termination on 10 March → suggestion 10 April. As a goodwill gesture the date can be overwritten when entering. The period is stated to customers in the portal.
save
Applies the details and leads back to the list. Afterwards select the model in the course data of the subscription courses.
Required fields are outlined in red as long as they are empty.
cancel
Back to the list without saving. Entries are lost.
Saved models remain unchanged.
Course types
Course types
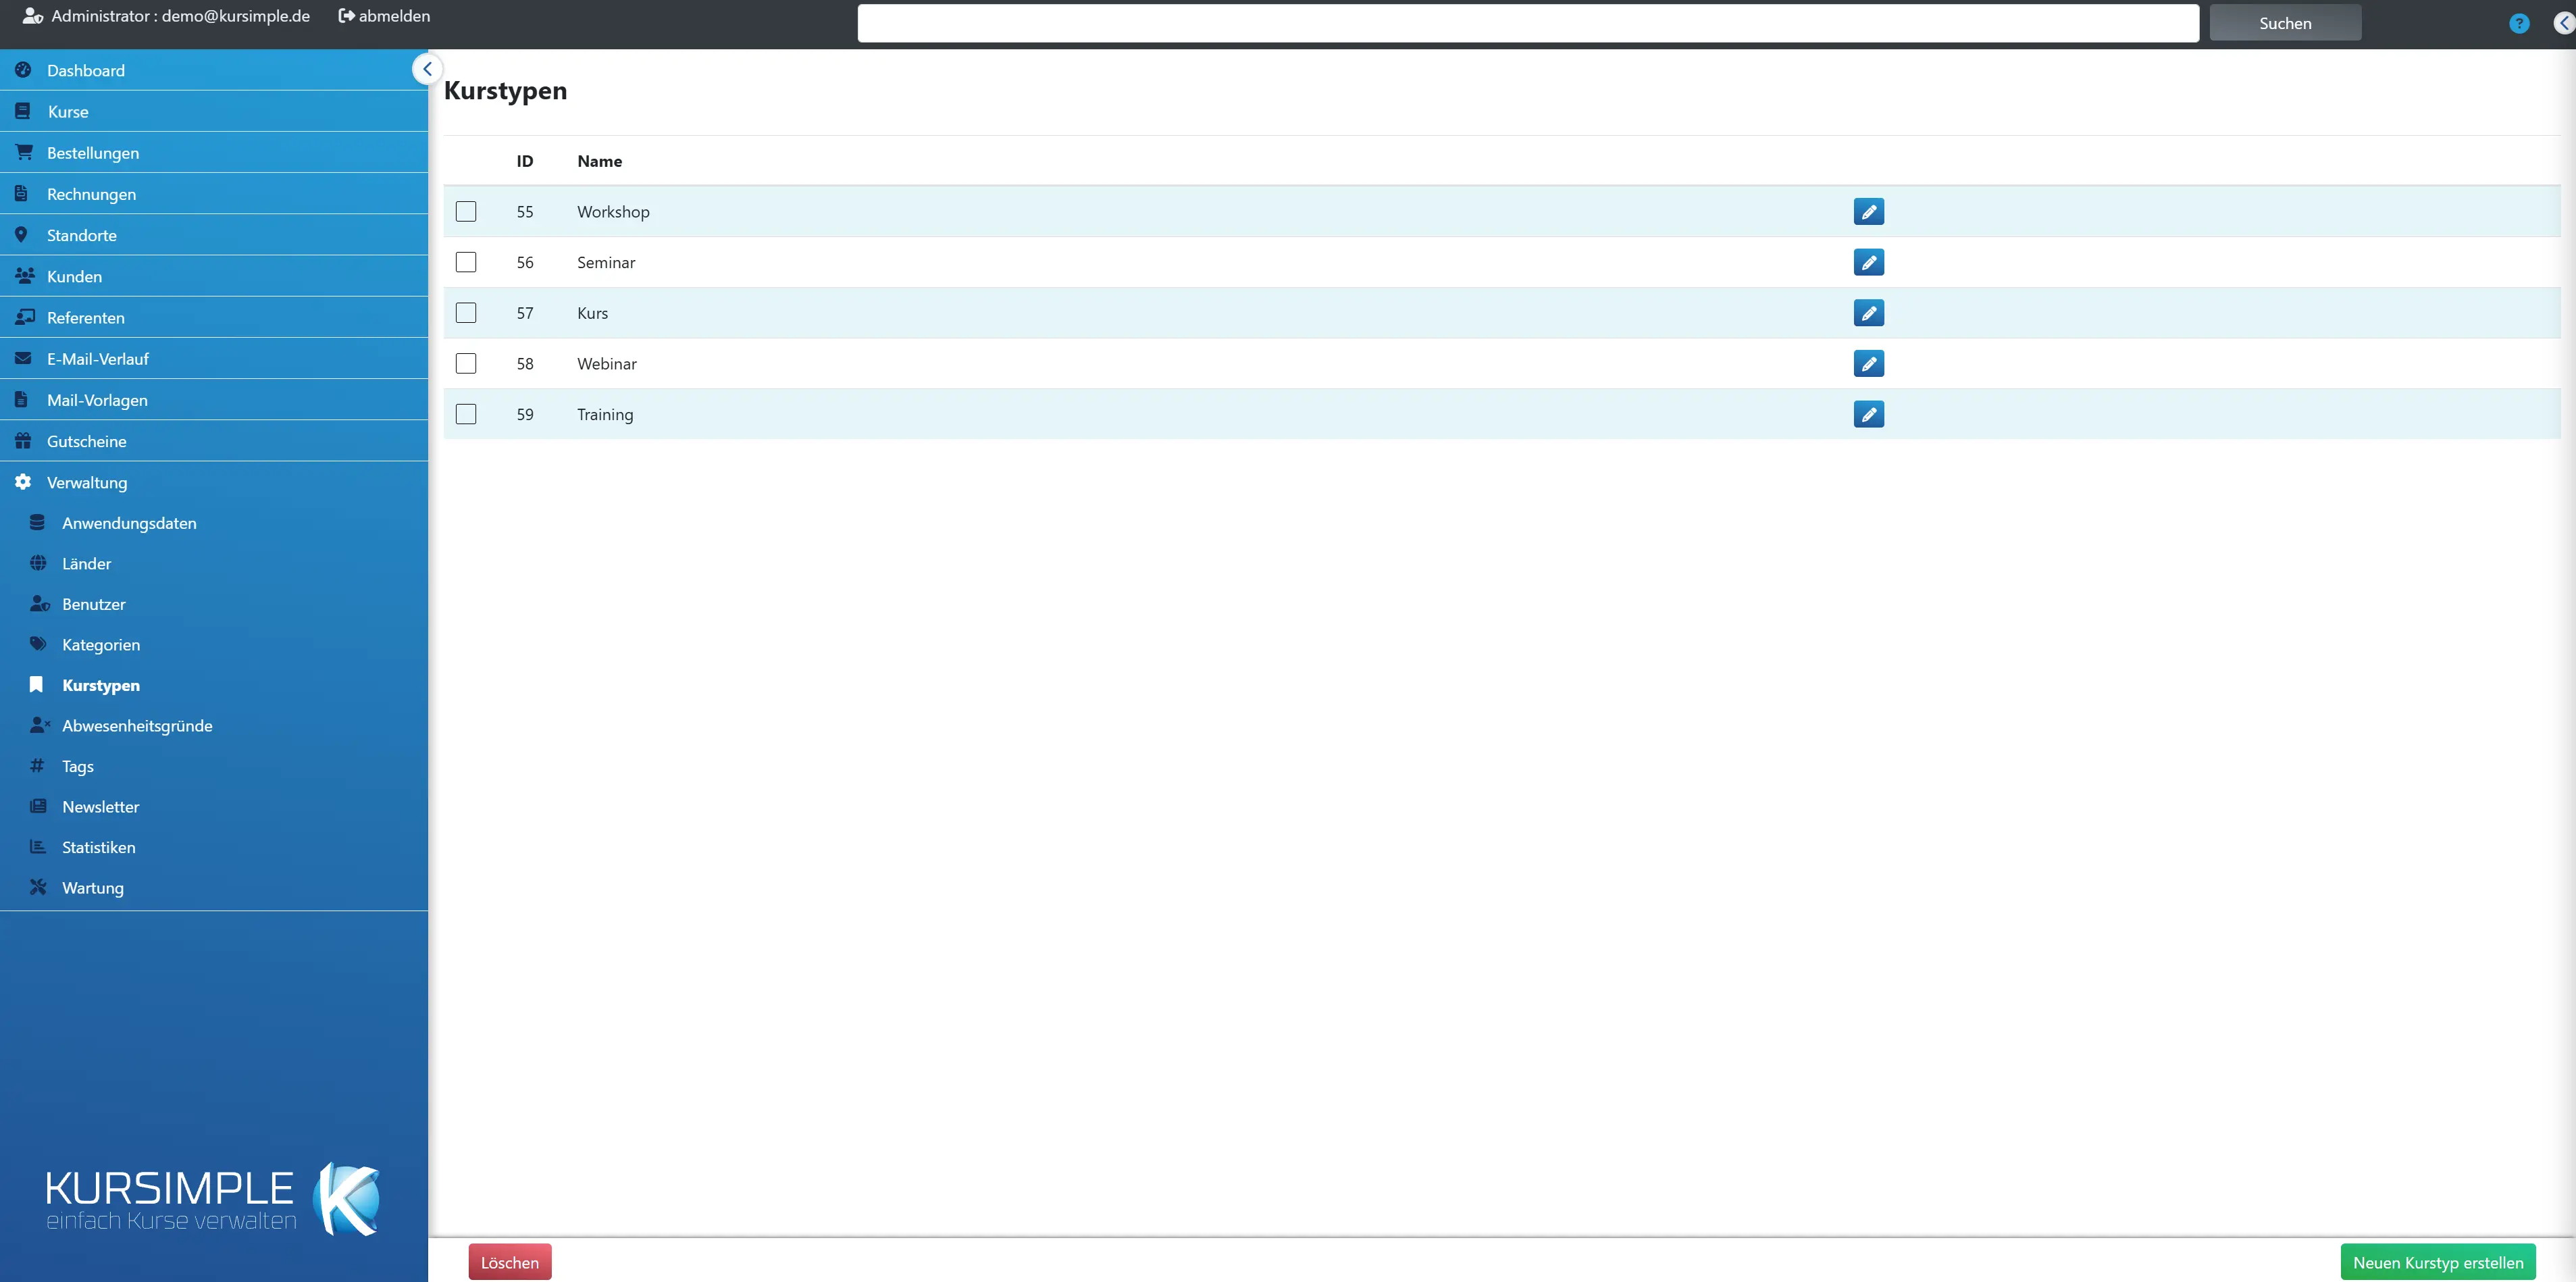
Course types describe the form of an offering – workshop, seminar, holiday course, online. Customers filter by them in the portal; each course gets at most one type in the course data.
Course type = format, category = topic. Together they make your programme searchable in the portal. In addition, custom fields can be restricted to certain course types.
How to proceed: “Create new course type” → enter name and slug → save → choose the type in the course data of the courses.
Selection
Checkbox for marking the types you want to remove with “Delete”. Types still assigned to courses cannot be deleted.
Remove the assignment in the affected courses first.
ID
Internal number of the type, assigned by the system.
Relevant for internal use only.
Name
This is what the type is called in course editing, in the course list (badge “Course type: …”) and in the portal filter.
Change via the pencil in the row.
Actions
Pencil = edit name and slug of the type.
Changes apply immediately to all courses of this type.
Delete
Deletes the marked types after confirmation. If a type is still assigned to a course, an error message appears and it is kept.
Cannot be undone.
Create new course type
Opens the form for a new type (name and slug).
Afterwards assign it in the course data.
Edit course type
Edit course type
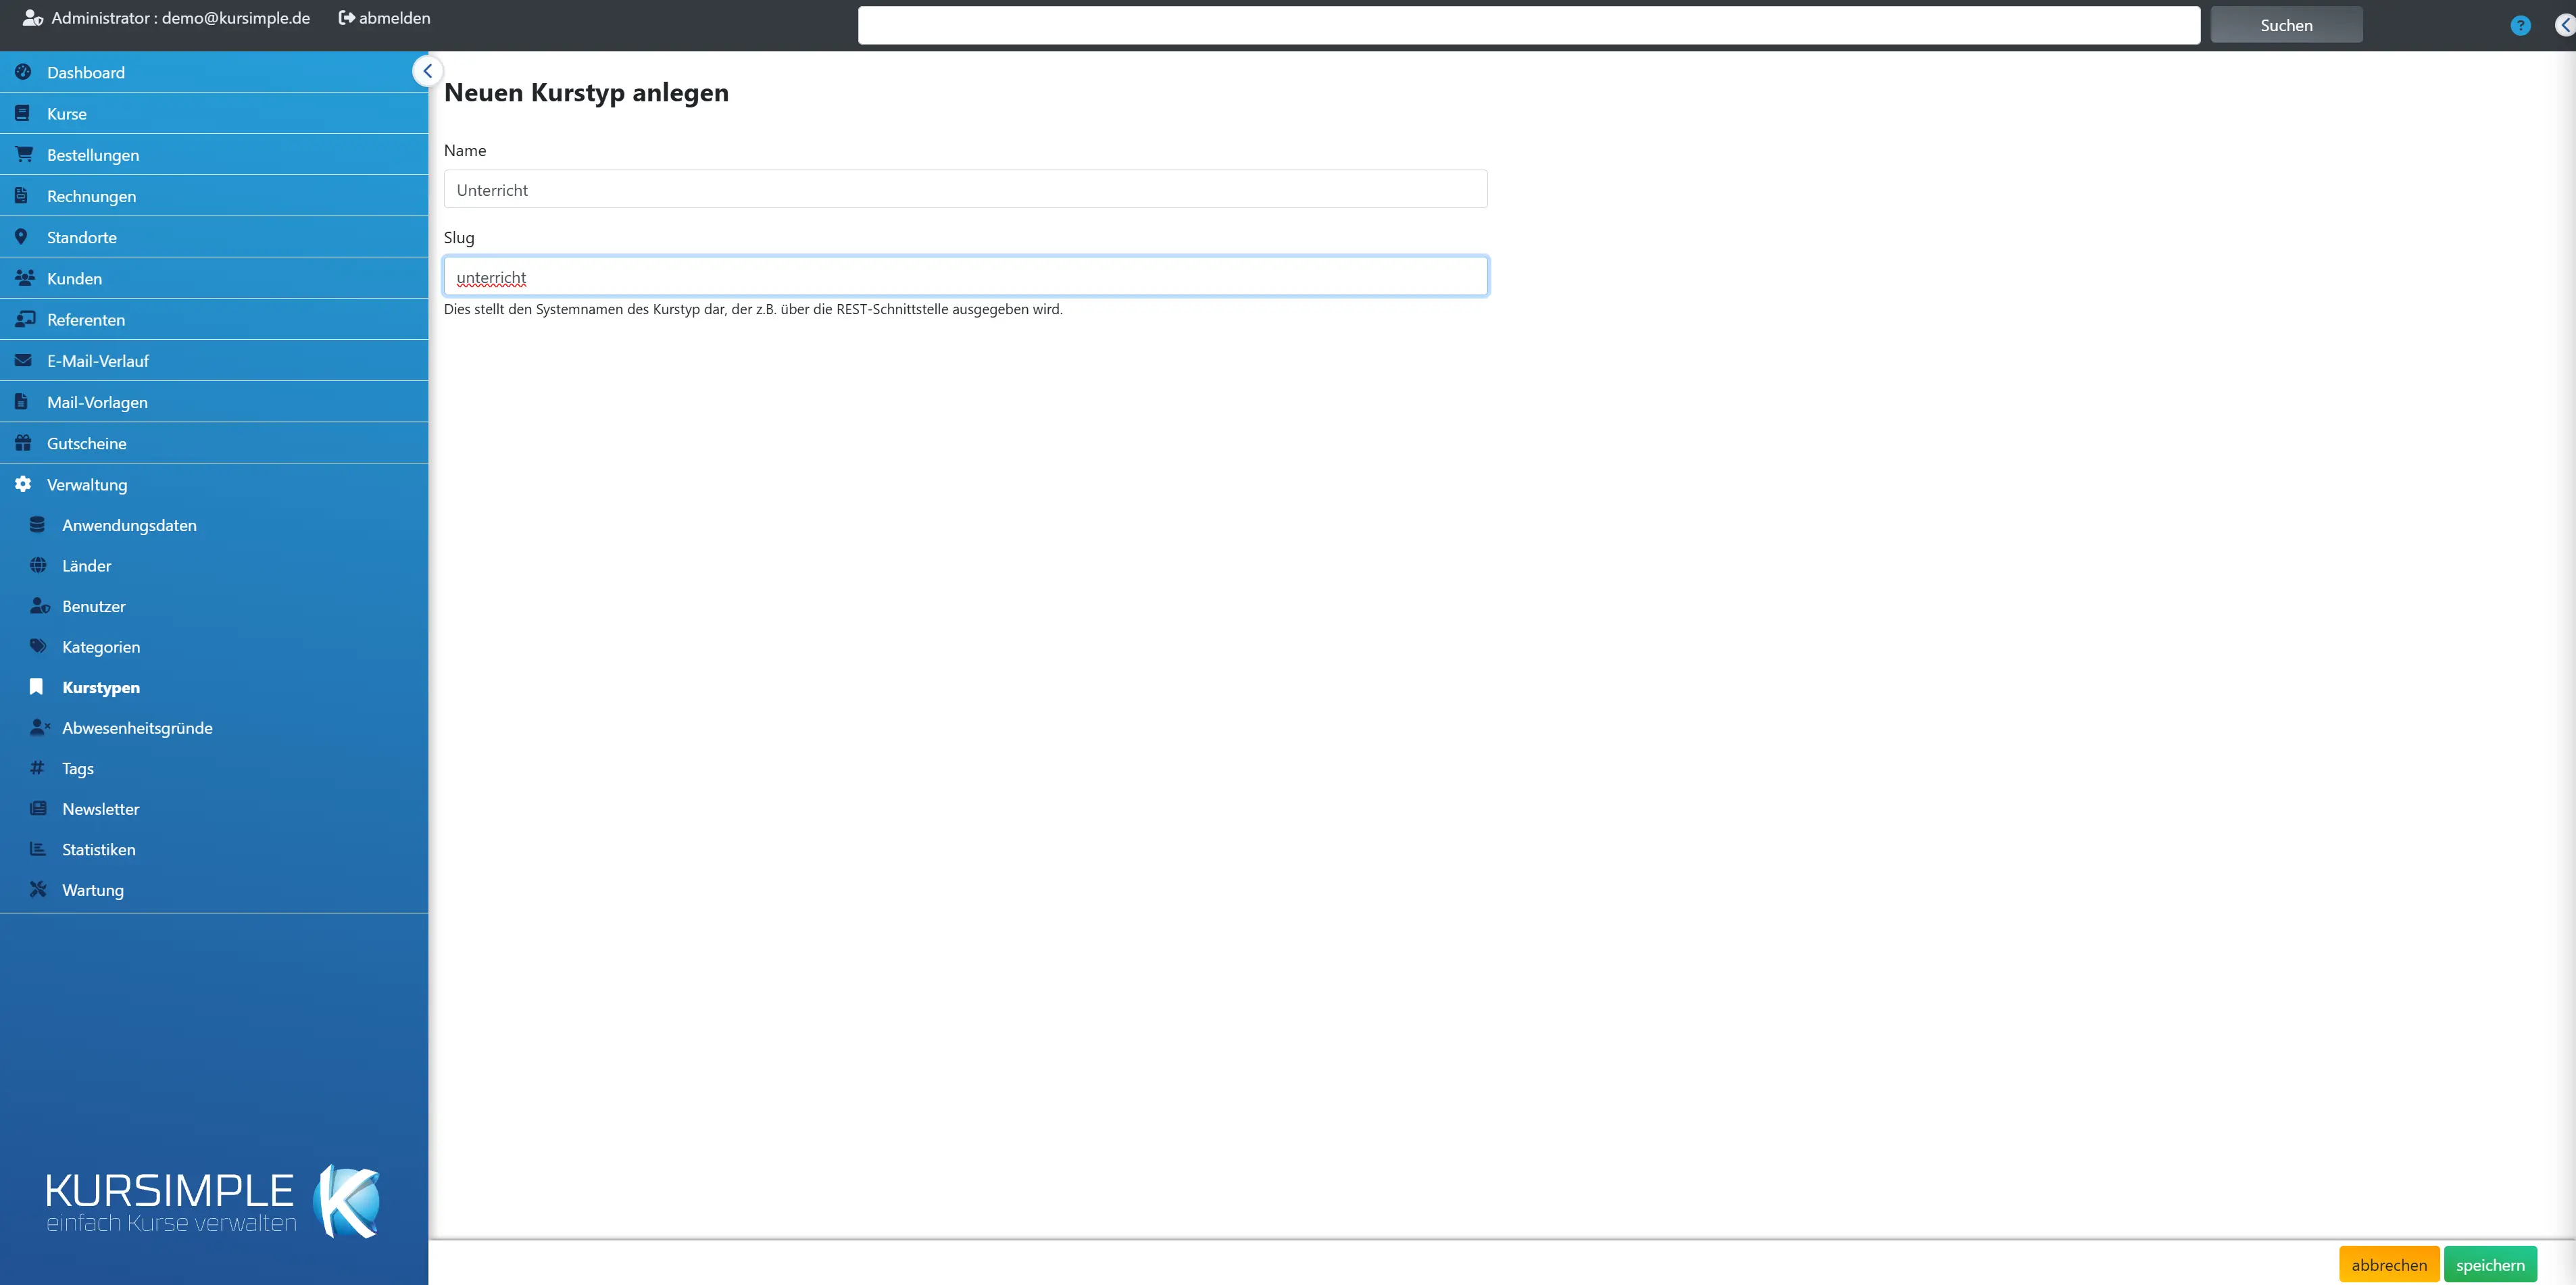
Name and slug of the course type. The name is for people, the slug for the technology (addresses and display in the portal).
After saving, the type applies immediately in all assigned courses.
Name
Required field, must be unique. Short and understandable for customers, e.g. “Workshop” or “Online course”.
Appears in the portal filter and in the course list.
Slug
Technical short form of the name for addresses and display in the portal: lowercase letters, digits and hyphens only, e.g. “online-course”.
Once assigned, the slug should not be changed any more – otherwise old links and display rules of the theme stop working.
save
Applies name and slug and leads back to the list.
A name that already exists is rejected with a message.
cancel
Back to the list without saving.
Entries are lost.
Categories
Categories
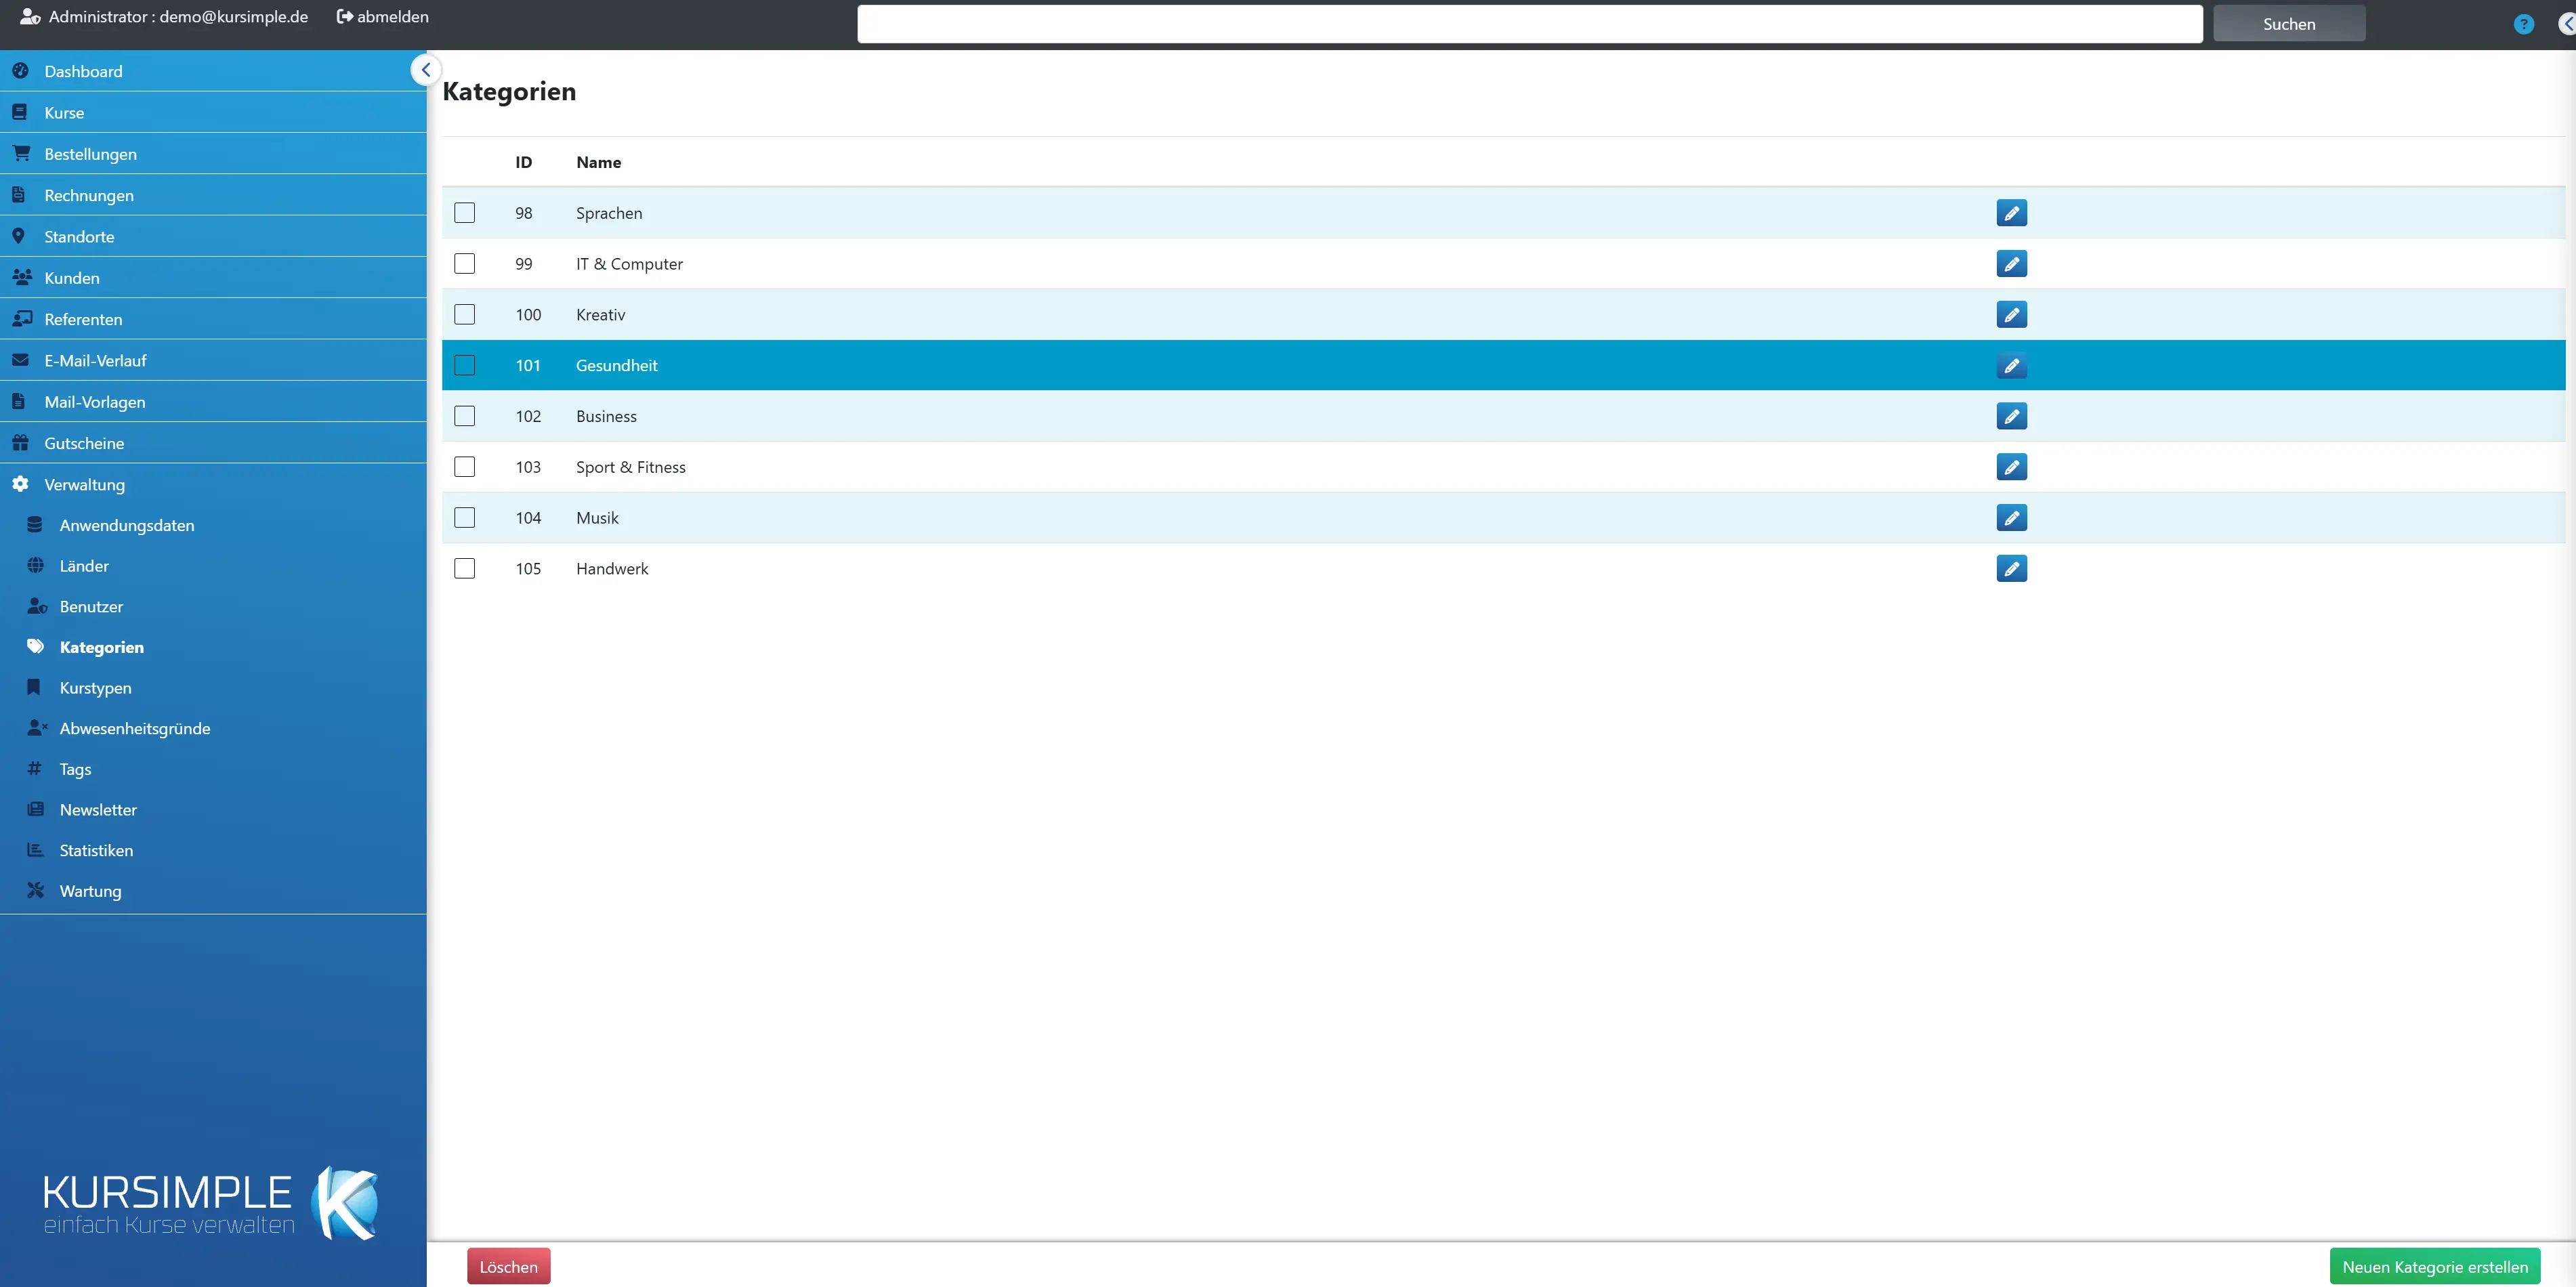
Categories are the topics of your programme – languages, health, creative. Customers filter by them in the portal; each course gets exactly one category in the course data.
Keep the list short (5 to 15 topics): too many categories make the portal filter confusing. For the form of the offering (workshop, online) there are the course types.
Categories can also control which custom fields a course shows and which email template is used for the order confirmation.
Selection
Checkbox for marking the categories you want to remove with “Delete”. Categories still assigned to courses cannot be deleted.
Remove the assignment in the affected courses first or assign the courses to another category.
ID
Internal number of the category, assigned by the system.
Relevant for internal use only.
Name
This is what the category is called in course editing, in the course list (badge “Category: …”) and in the portal filter.
Change via the pencil in the row.
Actions
Pencil = change the category's name. Applies immediately to all assigned courses.
You change the assignment to courses in the course data.
Delete
Deletes the marked categories after confirmation. If a category is still assigned to a course, it is kept – the message names it with the number of its courses, the other marked ones are deleted.
Cannot be undone.
Create new category
Opens the form for a new category – only the name is needed.
Afterwards select it in the course data of the courses.
Edit category
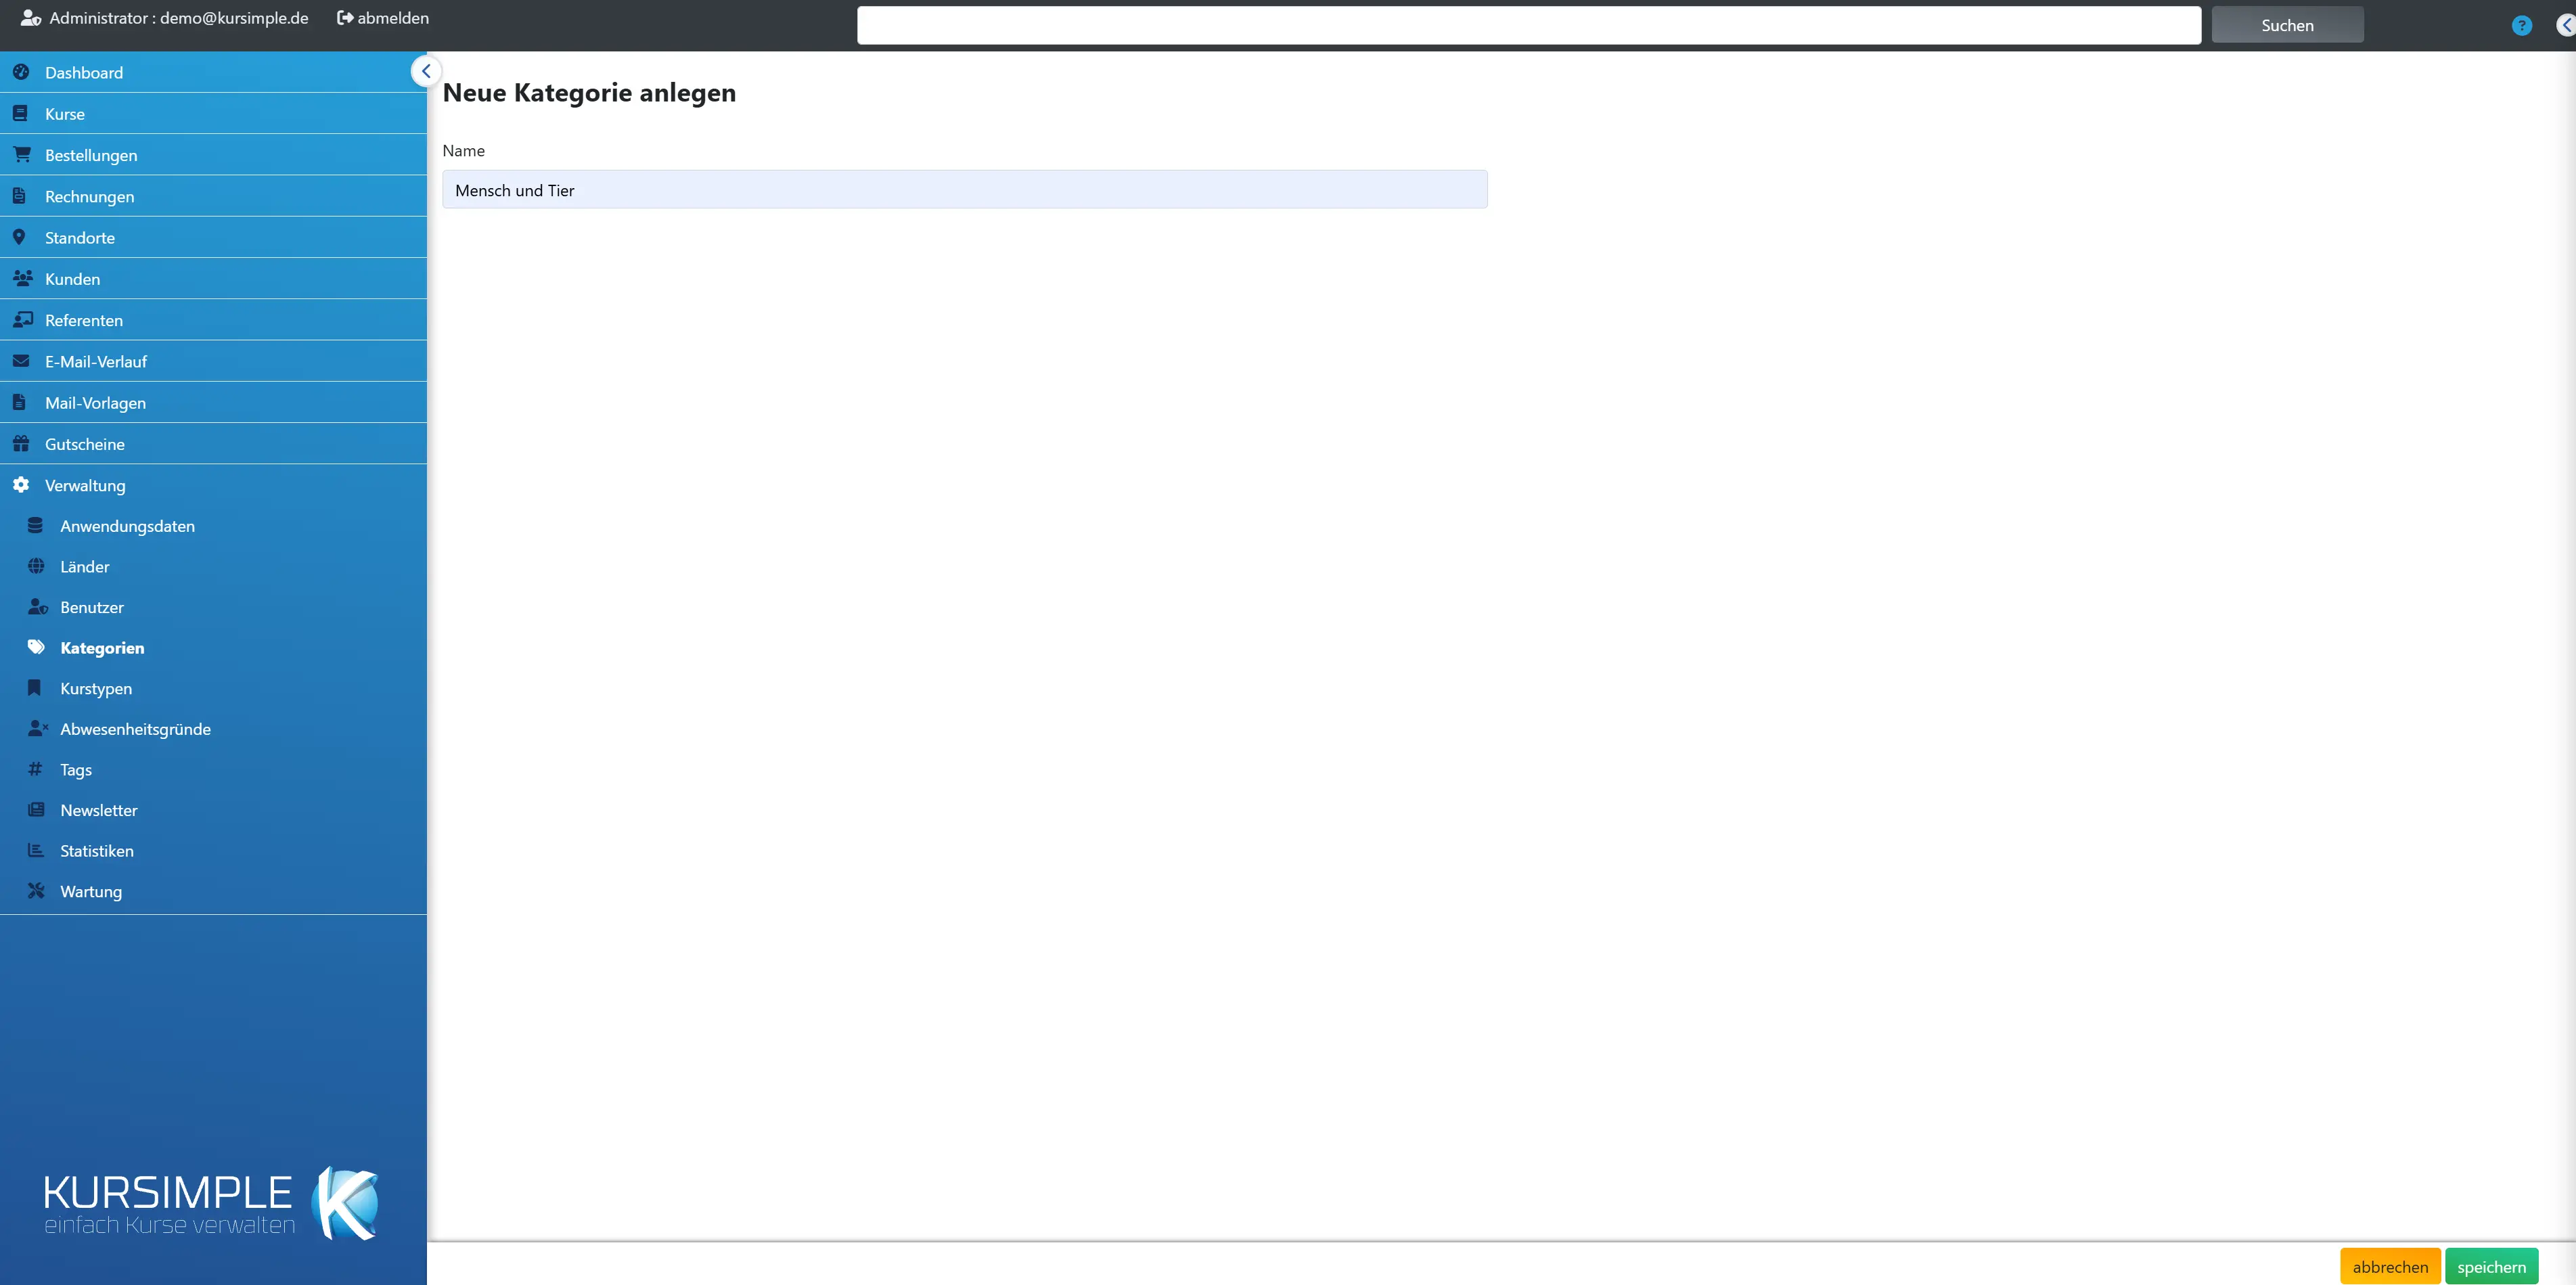
Edit category
The name of the category, as customers see it in the portal filter.
After saving, the new name applies immediately in all assigned courses.
Name
Required field, must be unique. Short and understandable for customers, e.g. “Languages” instead of “Foreign-language educational offerings”.
Think from the customer's point of view: under which word would one search for the course?
save
Applies the name and leads back to the list. Afterwards assign the category in the course data.
A name that already exists is rejected with a message.
cancel
Back to the list without saving.
Entries are lost.
new
new
Creates a new custom field: enter title and field type, “Create custom field”. You make the restriction to course types and categories afterwards via the pencil.
A new field is initially empty for all courses – you enter values in the course data.
Selection
Checkbox for marking the fields you want to remove with “Delete”. Caution: the values entered in the courses are lost in the process.
Consider whether you could instead display the field only for certain course types.
Title
The label of the field in course editing and in the portal. A click opens editing; dragging by the handle changes the order.
The order here is also the order in the portal.
Type
Text, date or number – determines how the field is entered in the course data.
Number fields are suitable e.g. for teaching units that should appear on certificates.
Actions
Pencil = edit title, type, course types, categories and certificate tick.
Changes apply immediately to all courses.
Delete
Deletes the marked fields together with all values entered in courses – after confirmation, cannot be undone.
Fields that are still needed elsewhere report an error and are kept.
Edit custom field
Edit custom field
Title and field type as well as the rule for which courses the field appears in: without a selection for course type and categories in all courses, otherwise only in the ticked ones.
Example: tick a field “Materials list” only for course type “Workshop” and category “Creative” – then other courses do not see the field.
Title
Required field. The label that editors see in the course data and customers in the portal, e.g. “Bring along”.
Keep it short; explanations belong in the value of the field in the course.
Field type
Text (free text), date (calendar selection) or number. Determines the input in the course data.
The type can be changed afterwards; values already entered are kept but may then no longer fit the type.
Course type
Tick the course types in which the field should appear. No tick = for all course types.
You maintain course types under Administration → Course types.
Categories
Tick the categories in which the field should appear. No tick = for all categories.
Course type and categories work together: the field appears if the course matches the chosen types and categories.
Certificate
Tick if the value of this field should be printed on the participants' certificates – e.g. “Teaching units: 40”.
The certificate template must provide for the field; if in doubt, ask whoever set up your template.
Save
Applies the details. Afterwards fill in the values in the course data of the affected courses.
The title is required.
Forms (additional data after order)
Forms (additional data after order)
Forms that customers fill in online per participant after booking – e.g. health questionnaire, declaration of consent, prior knowledge. Here you create forms; which course one belongs to you choose in the course data under “Additional form after booking”.
How it works: create the form and set it active → assign it in the course → after an order the customer automatically receives an email with a link per participant → the answers are in the order under “Courses and comments”; in the order list a badge shows whether it has already been filled in, and you can send the email again.
The menu item appears only if the feature is switched on for your tenant (Administration → Variables, ZUSATZFORMULAR_NACH_BESTELLUNG).
New form
Creates a form: name, texts for the email and the fields in the builder. At the end “Save” and assign it in the course.
Plan the questions beforehand: what do you really need to know, what is required?
ID
Internal number of the form, assigned by the system.
Relevant for internal use only.
Name
Designation of the form – this is how it appears in the course data for the assignment and as a heading for the customer.
Change via “Edit”.
Active
Yes = after orders of assigned courses the form email is sent. No = the form is paused but is kept together with its answers.
Deactivate instead of deleting if answers already exist.
Actions
Edit = change texts and fields. Delete = permanently remove the form after confirmation – existing answers are lost.
A form that is still assigned to a course you should deselect in the course beforehand.
Edit form
Edit form
At the top name, active switch and the two texts for the email to the customer; below the builder with the fields the customer fills in. Finally “Save” below the builder.
Order when creating: name → email texts → add fields (type, label, options if applicable, required) → arrange the order with the arrows → Save → assign in the course.
Fields for which answers already exist can no longer be changed – create a new field in that case.
Name of the form
Internal designation and at the same time heading for the customer, e.g. “Health questionnaire aqua courses”.
Appears in the course data when selecting the additional form.
Active
Only with the tick is the form sent after an order. Without the tick it stays prepared but unused.
Handy for finishing a form and only enabling it at the start of the season.
Text for the email
The introduction of the email the customer receives after the order – why they should fill in the form and by when. Placeholders: [BESTELLNUMMER] and [BESTELLDATUM].
Below this text the email automatically lists the links per participant. Example: “Thank you for your booking [BESTELLNUMMER]. Please fill in the health questionnaire for each participant so that we can plan the course safely.”
Text before the individual link
Label of the links per participant, e.g. “Here is the questionnaire for [TEILNEHMER]”. Placeholders: [TEILNEHMER], [KURS], [BESTELLNUMMER], [BESTELLDATUM].
Leave empty, then “To the form for …” stands before each link.
Form fields (builder)
The questions of the form in the order in which the customer sees them. Per field: pencil = edit, arrows = move, bin = remove. You add new fields on the right.
Changes in the builder are only applied with “Save” below the builder. Fields with existing answers are locked.
Tip: few, clear questions – every required field is a hurdle for the customer.
Add new field
Choose the type (text line, text area, radio buttons for a single choice, checkbox for multiple choice), enter the label, for choice fields the options separated by commas, required field if applicable – then “Add”.
- Text line – short answer, e.g. family doctor.
- Text area – longer answer, e.g. pre-existing conditions.
- Radio buttons – exactly one option, e.g. “Swimmer / Non-swimmer”.
- Checkbox – several options, e.g. allergies.
The field then appears in the list on the left and can still be edited there.
Save
Applies name, active switch, email texts and all fields from the builder. Without saving, changes in the builder are lost.
After saving, “Form successfully created/updated” appears. Afterwards assign the form in the course data if not yet done.
Required field
Tick if the customer must fill in the field before they can submit the form. Without the tick the entry is optional.
Required only for details without which you cannot accept the participant.
Subscription
Subscription
Here you set how the subscription is billed for each recurring session, and you see who is taking part right now, who joins in the future and who has already finished.
A subscription course has one or more recurring sessions with a repeat rule, for example one group on Monday and one on Wednesday. Choose the recurring session at the top; everything below it – billing, invoices, participants, attendance list – applies only to that session.
Every booking is a subscription application with a start date; when a participation ends, you enter its end date here. The tab only exists for subscription courses.
Billing
For the selected recurring session: price as a fixed amount per billing period or per course day, period of 1, 3, 6 or 12 months, invoice in advance or in arrears, first and last period prorated or in full, default payment method.
Each recurring session has its own billing. When you save, a new recurring session takes over the billing of the first recurring session in the course; after that you change it here independently. If no recurring session has billing yet, the list shows “Billing missing”, and no invoices are created until you save it here.
Fixed amount: every period costs the same, holidays change nothing. Per course day: number of course days in the period times the amount; skipped periods do not count.
In advance: the invoice is created as soon as the period starts within the lead time; in arrears: on the day after the period ends. Prorated calculates the first and last period to the exact day, or only with the course days from the start and up to the end.
The default payment method is preselected at checkout; customers choose between invoice and direct debit, as far as you offer them. The amount also appears in the course list and course page of the booking portal.
Recurring sessions
The sessions with a repeat rule from which the course days are created. One click selects one; the page then shows only its data.
The price of the recurring session is shown on the right. You can edit it via “Edit recurring session” below the billing. You create further recurring sessions under “Sessions” (switch on “Recurring session” in the course day planner).
“Booked today” counts the participations that are running today. A new start date is only possible if a place is free on every course day from then on – otherwise the booking goes onto the waiting list.
Invoices
The invoices of the subscription applications of the selected recurring session. There is one invoice per subscription application and period, with one line item per person.
Billing runs automatically every day: it creates due periods, finalizes the invoices and emails them; for direct debit the email is the pre-notification. If more than two periods are open for a person, the automation does not bill and reports it for review – then “Bill due periods now” helps.
Both buttons only affect the selected recurring session. “SEPA file for direct debits” takes all sent direct-debit invoices that have not yet been collected and have a mandate on the customer record; anything missing is shown afterwards as a notice above the page.
Attendance list for a period
Choose from–to and download the list of the selected recurring session as a PDF for printing or as a CSV. Columns are its course days in the period, rows are everyone who took part in it.
Anyone who only starts or ends within the period appears in the list with their start or end date; the course days before or after are greyed out and blocked with “–”. The header line shows the rule and the period.
Participants
Active: start reached, no end date or end date not yet passed. Future: start is in the future. Ended: end date is in the past.
“Enter end date” suggests today plus the notice period of the subscription model, rounded up to the end of the billing period. “Change start date” only works as long as nothing has been billed for the participation.
Enter end date
Enter end date
The last day on which the person takes part. After that they receive no more invoices and are inactive in the attendance records.
An end date before the period that has already been billed is possible; the billing credits periods that were charged too much.
Save end date
Saves the end date and the reason. “Cancel end date” lets the participation run indefinitely again.
If there are active reasons under Administration → Reasons for Leaving, a reason is required.
Change start date
Change start date
The first day of the participation. Billing starts from it, and the person counts towards the places from then on.
If anything has already been billed for the participation, the start date can no longer be changed.
Additional form of the course
Additional form of the course
All bookings of the course with the status of the additional form: green = completed, orange = not yet received. “Details” shows a customer's answers.
Cancelled bookings and waiting lists do not appear. The answers can be sensitive (e.g. health questions) – that is why only administration and admins can see this tab.
Form
Green: completed, with date. Orange: not yet completed. A click on the icon sends the customer the form email again – also for green, if the customer wants to change their answers.
The email goes to the customer's current contact email. If the customer fills in the form again, the previous answers are kept as an earlier version; the list then shows “Version 2” (3, …) and the details show all versions.
Form results as PDF
All completed forms in one PDF: customer by customer, the answers in two columns, customers separated by a line. At the end it lists who has not completed the form yet.
The PDF opens in a new tab; from there you can save or print it.
A customer's answers
A customer's answers
All questions of the form with this customer's answers, plus the order, session and participants.
Questions that were not answered show a dash. If the customer has completed the form several times, you see the current version at the top and, below it under “Further versions”, the earlier answers to expand.
Rather see it than read about it?
In 30 minutes we will show you Kursimple with your own course programme. Or set up your own test system in 30 seconds – both free and without obligation.
Questions? +49 5931 990 99 10 · Mon–Thu 8:30–17:30, Fri 8:00–14:00 (CET)